Editing the mechatronics wiki
The easiest way to get started is by looking at the code of an existing page that is formatted in a way you like. Or copy code from this page by "edit"ing it and just copying the portions you want.
You can learn more about editing a wiki by going to wikipedia's help page. Below are some basic guidelines to get you started. You can click on "edit" at the top of this page to see the wiki code that generates this page. Experiment with the formatting buttons at the top of the editing page to see what they do.
Level 1 Headline
Level 2 Headline
Level 3 Headline
If your wiki page has headlines, generated for example by the code
= Level 1 Headline =, == Level 2 Headline ==, and === Level 3 Headline ===
the page will automatically create a table of contents before the first headline. Most pages do not need more than one level of headlines, and the formatting buttons at the top of the edit page provide you access to "Level 2 Headlines," so you should just use that by default, unless you have reason for more levels of headlines.
(Note the use of the "nowiki" command above that allows what you type to appear as you wish without wiki formatting.)
Topic and Name of Your Page
To create a new page, simply make a reference to it in an existing page by using code such as this: [[Page Name | the text you use to refer to the page]], or simply [[Page Name]]. Then you can click on the link created in the existing page and it will open the new page for editing. To make your page as useful as possible, it should have an informative, succinct name (which can be found by searching) and be focused on a particular topic. It should also be properly indexed so users can find it by browsing. If there is already a page on a similar topic, consider modifying that page rather instead of making another page with similar content. If you make significant changes, you should provide the reason for your changes when you save the edit. If you are writing a page on a large project, but there is a particular new capability that you've contributed, then consider creating a separate page and indexing it in the wiki appropriately, so others can find it without having to search your entire project page.
It is a good idea to provide links to other related helpful sources, on this wiki or external (for example wikipedia). Wikipedia uses references that appear at the end of the page, but this is not necessary.
Creating Internal and External Links
Use links to help the reader find more information. When you link to a page on this wiki, use an internal link such as this, generated by [[Main Page | this]], instead of an external link such as this, generated by [http://hades.mech.northwestern.edu/wiki this]. This is so the link will continue to work even if the wiki is moved to another server.
Including Images and Other Media
Do not use copyrighted material. If you find material on the web that is useful, you can link to the appropriate pages. If you get an image from a web page that is useful for your page, be sure to provide an acknowledgment and a link to the original page.
When you are saving an image or other media file on the wiki, make sure to give it a unique name. For example, "circuit-diagram.jpg" would not be a good name. If you are documenting a project by Anita Brown, Chuck Davis, and Eileen Finnegan, for example, you could begin each uploaded file name with the initials of the group, e.g., "AB_CD_EH_circuit-diagram.jpg."
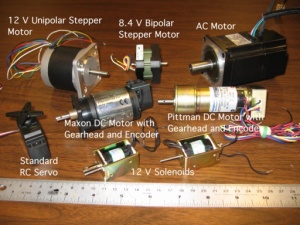
In general, images should be at the right and relatively small, i.e., thumbnails. You can edit this page to see how the images are formatted to be thumbnails at the right. The caption can be a link to another page or just plain text. When the user clicks on the image, they see the full size image. Make sure the full-size image is large enough to see necessary detail, but don't upload unnecessarily large photos.
Sometimes it is appropriate for images to be larger, and not at the right. In that case, just modify the formatting commands in your "image" command.
Sometimes you want to give step-by-step instructions or description, with an image for each step. For instance, this text is associated with "Project 1," pictured at right. To keep the text lined up with the images, you can use a <br clear=all> command to make sure that everything after that command will appear below the preceding photo and text, which makes sure that the next text is lined up with the next photo.
And here is the text for Project 2, with the image to the right of this text.
Other than image files, you might want to upload media such as pdf, zip, CAD, gerber (or other for printed circuit boards), MS excel, MS word, program, or movie files. As a rule, don't upload very large files, or files that can reliably be found elsewhere. If the file can be found elsewhere on the web, just use a link. Movie files more than 1 or 2 MB should be uploaded to youtube and linked to. You can link to a pdf file like this link to a motor data sheet, and similar syntax applies to other file types.
Making a List
Making a list is easy. Here's one with three levels of hierarchy.
- Item 1
- Item 2
- Item 3
- Item 3A
- Item 3B
- Item 3B1
- Item 3B2
- Item 3C
- Item 4
Including Math
Math is formatted using LaTeX commands. See this page or any wikipedia page that uses math to learn more about it. Here are a few examples:
Note the slight difference in formatting the examples above.
Making a Table
Just use html commands. Example:
|
Routine |
Time at 20 MHz clock speed* |
Measured Values |
|
int8 x int8 (unsigned) |
0.2 us |
0.8 us |
|
int8 x int8 (signed) |
1.2 us |
0.92 us |
|
int16 x int16 (unsigned) |
5.6 us |
6.0 us |
|
int16 x int16 (signed) |
8.0 us |
6.0 us |
Including a Program
Programs should be commented. Long programs should be uploaded as media files. Short code snippets can be included in the text of the page similar to the following example. Note that by indenting each line by one space, you get the different font and background color.
%  SerialComm.m  Scott McLeod, Sandeep Prabhu, Brett Pihl 2/4/2008
%  This program is designed to communicate to a PIC 18F4520 via RS232 (Serial) Communication.
%
%  The main loop of this program waits for a character input from the user,
%  upon which it transmits the ascii value and waits for data to be written.

s = serial('COM4','BAUD',19200);            % Create serial object (PORT Dependent)
fopen(s)                                    % Open the serial port for r/w

myChar = 'a';
prompt = 'Enter a character (q to exit): ';

while (myChar ~= 'q')                       % While user hasn't typed 'q'
    fprintf(s, '%s', myChar(1))             % Write first char of user input to serial port
    fprintf(fscanf(s))                      % Read Data back from PIC
    myChar = input(prompt, 's');            % Get user input
end

fclose(s);                                  % Close the serial port
delete(s);                                  % Delete the serial object


