RGB Swarm Robot Quickstart Guide
This guide was written as a quickstart guide for the RGB Swarm Robot Project Documentation, but contains general information about programming e-pucks and using the vision system.
Checklist
- Physical Set Up
- Follow the setup as described in RGB Swarm Robot Project Documentation: Physical Setup
- In addition, there needs to be a computer connected to the vision system webcams, as well as to a computer to act as a data logger (this can be the same computer)
- Each analytical program run will need its own XBee radio, more information on this below
- Equipment Needed
- e-pucks with XBee radios, XBee Interface Extension Boards Version 2, and LED Pattern Boards
- XBee radio serial adapter boards with radios
- Each analytical program run on the computer requires its own XBee radio, as a radio cannot be shared from program to program
- A simple set up may requires only two (2) radios, one for the Vision System program, and another for a data logging program
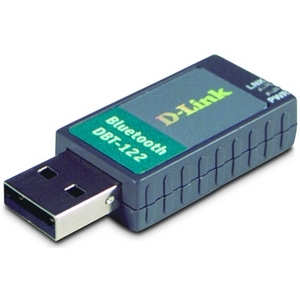
- A bluetooth adapter, internal or external; ours looks like this
- Computer Programs Needed
- X-CTU, download at the Digi X-CTU Download
- Tiny Bootloader, download at Tiny Bootloader 1.9.8
- Visual Studio (2010)
- These are needed to edit and build the code for the e-puck
- Microchip MPLAB
- Microchip MPLAB dsPIC C compiler
e-puck and e-puck Code
Follow the instructions here RGB Swarm Robot Project Documentation: Software to download the epucks code. Then build this code using MPLab and the instructions below.
Preparing the e-puck code
- Once the code above is built, it generates a .hex file, which is ready to be uploaded onto the e-puck, skip to Connecting the e-puck
- Note: if you cannot find this .hex file, or you have changed the code, follow the steps below
- To compile the code follow these steps
- Open the workspace file (extension .mcw) of your project/code
- Click the Build All button (looks like a stack of papers getting pushed down by two arrows)
- Check for the BUILD SUCCEEDED line at the end of the dialog box, save and close the workspace, and then look for the new .hex file in the folder that the .mcw file is in
- This will be the .hex file you use for programming and uploading onto the e-puck
Connecting the e-puck
- Go to start menu >> control panel >> Bluetooth Devices
- Click the 'Add...' button in the lower left of the dialog window
- Turn on the e-puck that you wish to configure/connect to the computer
- Check the box next to 'My device is set up and ready to be found.'
- Continue with the Next button, and the computer will search for your e-puck
- Once the computer finds your e-puck, select the appropriate e-puck (should be ID'd by the 4 digit ID number), and assign the 4 digit ID number as the 'passkey' for that e-puck (note that epuck #2 (bluetooth 1326) is faulty. Enter 0000 for the pairing code to use this e-puck.
- This process reserves a pair of COM(serial) port for that specific e-puck, one as Incoming and the other as Outgoing; each e-puck will have a different pair of ports
- Return to the Bluetooth Devices Dialog screen, and click on the COM Ports tab
- Check which COM ports are assigned to your e-puck, specifically the Outgoing COM port; this COM port will be used when programming this e-puck with the TinyBootloader program
- Note: if using a USB Bluetooth dongle, when the dongle is unplugged and replugged it into a different USB port, or a different dongle altogether is used, it may be necessary to repeat these steps for each e-puck that you wish to use
- Note: these instructions are for using Windows XP Professional Edition. The exact command paths and dialog boxes may differ from OS to OS
Programming the e-puck
Programming the e-puck requires a specific program, called a bootloader, in order to (re)program the microcontroller. The bootloader makes use of the bluetooth/serial port connection, allowing for wireless programming, as opposed to connecting a specific serial port connector directly to the microcontroller. This expedites the reprogramming process. The bootloader is comprised of two parts, one which operates on the e-puck, writing code to the e-puck microcontroller, and the other, which operates on the computer as user interface. On the e-puck side, the bootloader quickly checks to see if something is trying to re-program the PIC. If so, the bootloader will simply write the new software over the old, and then run the new software. If not, the bootloader simply allows the PIC to run the program currently loaded. The computer side allows a user to select which COM port to program over (allowing one to select which e-puck to program), and selecting what HEX file to program to the e-puck.
To program the e-puck with a bootloader, follow these instructions:
- Note: you will have to compile and build the C code from the Microchip C compiler, as the .hex file is needed to install onto the e-puck
- Start the Tiny Bootloader program on your computer
- Click the Browse button and select the .hex file that corresponds to the e-puck code that you want to program
- Set 115200 under the Comm dropdown menu, and select the COM port that corresponds with the OUTGOING COM port of the e-puck
- Click the Write Flash button
- Immediately click the blue reset button on the e-puck
- Note: The reset button must be clicked before the blue status bar on the Tiny Bootloader dialog screen reaches zero, representing the program timing out.
- Once the bootloader starts writing software, the blue status bar will grow, representing code being uploaded and programmed
- Note: In addition to the blue status bar, a orange LED on the e-puck will light up, signaling that a connection has been made
e-puck Troubleshooting
- If Tiny Bootloader cannot connect to the COM port, make sure your e-puck is on, and that you've selected the correct COM port assigned to the e-puck (the ID of the e-puck is on a sticker on top of the bluetooth chip on the e-puck's PCB.
- If Tiny Bootloader can connect to the e-puck but cannot find the PIC, it may be that someone has overwritten the bootloader with another program. If this is the case, you will need to reload the bootloader.
- MPLAB and the ICD2 programmer are needed to reload the Tiny Bootloader software via the flash port of the e-puck
- Go to http://www.e-puck.org, goto Download >> Software >> Library, download the zip file, and extract the archive
- Navigate to e-puck-lib\tool\bootloader\epuck_side, look for tinybld_ds6014A_7.37Mhz_115200uart1_8xPLL_with_LEDs.hex hex file.
- Open MPLAB
- Go to Programmer >> Select Programmer >> MPLAB ICD 2
- Go to File >> Import
- Select the tinybld_ds6014A_7.37Mhz_115200uart1_8xPLL_with_LEDs.hex file
- Go to Programmer >> Connect, and when connected, go to Programmer >> Program
- Note: flash programming the e-puck takes significantly more time that programming via the bluetooth port, so please be patient
XBee Radio
Programming the XBee Radio
- Refer to: Configuration for e-puck XBee radios
These steps are for programming the Xbee Radio, whether for the e-puck or the data logging or vision computers. Certain steps may be skipped however for each kind of radio.
- Note: In order to program the e-puck radio, it will be necessary to remove the XBee radio from the e-puck and place it in one of the Serial Port Adapters connected to the computer
- Start the X-CTU program
- Under the PC Settings tab, Select the COM Port of the Serial Port Adapter you are using from the list on the left
- Set the Baud to 115200, and leave the other settings alone/standard
- Hit the Test/Query button to ensure that X-CTU can see/hear your radio
- Note: If there is difficulty connecting, or the XBee radio cannot be found, it may be necessary to try every frequency listed. X-CTU does not automatically detect what the Baud on the radio is, and while the radios currently used are all set to have a Baud of 115200, they may be reset, and it will be necessary to manually test each Baud freqency via X-CTU.
- Upon success, a dialog box should display 'Communication with modem.. OK', 'Modem Type = <something>', and Modem firmware vision = <other thing>'; click OK
- If there are no problems connecting, switch the X-CTU program to the Terminal tab
- In the blank terminal screen, type the following commands below
- Type '+++', and press <enter>. this signals to the XBee radio that you wish to program it.
- Wait until the radio responds with OK
- Type 'atre'. This command resets the settings of the XBee radio.
- Type 'atmy', followed with the ID number, e.g. your command would be 'atmy 3'. This command sets the XBee radio ID.
- Note, that e-puck ID's are from 1-31, whereas all the computer radios have an ID of 0.
- Type 'atap 2'. This sets the XBee radio to use the API language with interrupts (to ensure packet quality)
- Type 'atd6 1'. This is related to the RTS pin, and allows the radio to hold packets in buffer
- Note: SKIP THIS STEP if you are programming a computer Xbee radio, such as for the vision system or data logger.
- Type 'atbd 7'. This sets the Baud to 115200, the frequency used for radios in this project
- Type 'atwr'. This writes the settings to non-volatile memory, saving it even when the radio is powered on/off.
- Type '+++', and press <enter>. this signals to the XBee radio that you wish to program it.
Troubleshooting the XBee Radios
- XBee radios can only be used by one program at a time, and if an XBee radio is being called by two different programs, this may lead to problems. This is due to the fact that each XBee radio is connected to one 'virtual' COM port, and said COM port can be used by only one program at a time.
- For instance, after configuring the XBee radios with the X-CTU terminal program, remember close that program to prevent further problems
- If running multiple RGB Swarm programs on one computer, such as the Vision System and the Matlab RGB Swarm Data Grabber program, two XBee radios with two serial port adapters will be needed
- Note: both radios will and must be ID'd as 0 even though they are to different programs
- Try some of these steps if your XBee radios do not seem to be working
- 'Not getting any signal from the e-puck XBee radios' or 'E-pucks are not getting any signal from the computer radios'
- Check the serial port adapter boards: towards the back of the board near where the plug is, there are two columns of three (3) LED lights. The left most column of lights should be blinking. The yellow light signifies that a packet is has been received, and a green light signifies that a packet is being sent.
- Check the e-pucks: the e-pucks should be blinking a red light at the back of the e-puck (where the 4 digit ID is) every time a packet is sent from the e-puck
- Check the XBee radio settings: occasionally, the Vision System or Matlab software can corrupt and reset the settings on their respective XBee radios. Make sure that these settings are correct. Do this also for the XBee radios on the e-pucks (just try one radio first to see if that fixes the problem; rather than doing them all and realizing the problem still exists)
- Use packet analysis tools: these analysis tools allow for direct visualization of packets. Below is a list of tools you can use
- Open up X-CTU to a connected serial adapter board and XBee radio, and see if you are getting any sort of signal in the terminal box. If the radios are configured to work with one another (e.g. with a e-puck XBee radio and a data logger XBee radio), one should be able to see some signal (it will look like gibberish, this is because it is in hex)
- Use a Visual Studio packet tools, such as the Packet Data Sender or Packet Data Viewer to check if your XBee radios are working
- 'Not getting any signal from the e-puck XBee radios' or 'E-pucks are not getting any signal from the computer radios'
Machine Vision Localization System
Download the files here. Open the solution in the main folder SwarmSystem in Visual studio 2010. Make sure the COM port in UserInterface.h is up to date and hit run.
Analysis Tools
Matlab Tools
Obtain the Matlab files by following these instructions RGB Swarm Robot Project: Software and opening the DataAquasition folder. Inside this folder you will find the following files:
- puckUI.fig - This is the figure for the data acquisition GUI
- puckUI.m - This is the m-file which is used to look at the data the epucks are sending back. The color sensor data from the selected epuck is shown on the left and the positions of each epuck is shown on the right. On the bottom is a table of all the data sent from the epucks. There is also a toggle to display the coordinates with respect to the center of the epuck or with respect to the color sensor on each eapuck.
- Note: In order to access the log of data which has been received by the epucks, simply call global data_log. Currently the data_log variable holds the last 100 packets of data received by each epuck. To change this, simply change the RECDUR variable in the puckUI_OpeningFcn. Also, currently the timer periods of .4 seconds for plot updates and .05 seconds to receive data work efficiently and do not take up too much CPU, but these values can be changed in puckUI_OpeningFcn as well.
- serialdllsample.m - In this file are all of the matlab functions needed in order to open the port, send commands, etc. from matlab using the dll in SerialCommands.
- ProjectorLight.m - When this file is run, it will generate a matrix of 81 incident angles of light from the projector across the surface of the floor. This file is useful for determining the calibration of location and intensity of light picked up by the color sensor.