Programming HID Bootloader on PIC32
The bootloader is used to install programs on the PIC32 without using an external programmer like ICD2 and does not require any drivers on the computer. The PC software for the bootloader for the PC has already been installed with the Microchip Applications Library.
Software
PIC Source Code
For each new program, you will need to make a folder that will contain the source code and the project.
- Create a new folder in a spot that you want all of your code to be located and call it Bootloader. I recommend making a folder called PIC32_Code to hold all of your project folders.
- Download the PIC32 bootloader zip file here.
- Extract this zip file into the Bootloader folder. Copy and paste the files located inside this folder into the Bootloader folder. When you are done the Bootloader folder will have 7 files in addition to the zip file and folder.
These files were tested with the Applications Library updated on November 18, 2009. If you are using a different library, these files may not work.
PC software
In order to load files with the bootloader, you will have to run a PC application called HID Bootloader. This bootloader should have been installed with the applications library.
- Verify that there is a HID Bootloader located under the start menu Programs -> Microchip -> MCHPFSUSB v2.6 -> Tools -> HIDBootLoader
Running this requires a sufficiently recent version of the .NET Framework, which you may not have if you are running XP or earlier versions of Windows. This issue should have been resolved when installing the Applications Library. You can download a sufficiently recent version here (the install takes a while): .NET Framework download.
Installing a Bootloader on the PIC32 with ICD2
These directions detail how to start a new MPLAB project and program the HID Bootloader on the PIC32 with the Microchip MPLAB ICD 2 (In-Circuit Debugger).
We are going to create a project to install the bootloader on the PIC32. This code only needs to be loaded to the PIC32 once. After this, you will no longer need the ICD2 to program the PIC.
Starting a New MPLAB Project
- Open MPLAB IDE.
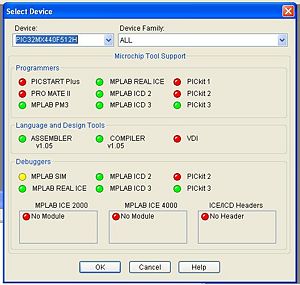
- Choose Configure>Select Device to select the PIC32MX460F512L (the PIC you are working with). In the Device dialog, select the PIC you are using from the list if it’s not already selected. The lights show which software is supported for that PIC.
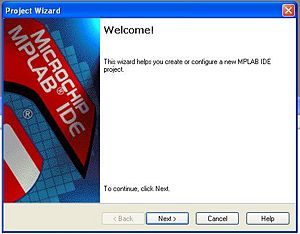
- Choose Project>Project Wizard to start a new project. Click Next
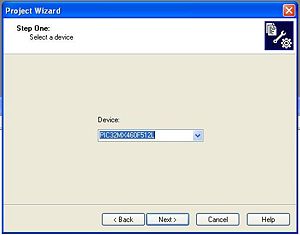
- Select the PIC32MX460F512L from the drop down menu. (It might already be selected) Click Next
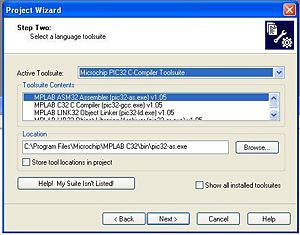
- Select the Microchip PIC32 C-Compiler Toolsuite from the drop down menu. Click Next
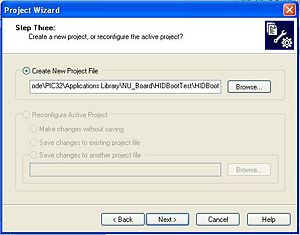
- Create a new project (I called it Bootloader) in the Bootloader folder.
Click Next
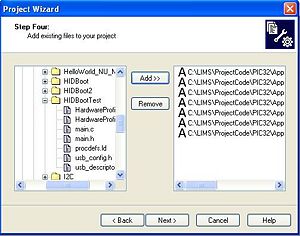
- Add the following the c files to the project. These files should be located in the Bootloader folder.
- HardwareProfile.h (generic header file for many different boards)
- HardwareProfile_NU32.h (hardware profile for the NU32, if you have your own hardware profile you will need to add it to the generic HardwareProfile.h)
- main.c (the main source file)
- main.h
- procdefs.ld (a linker file)
- usb_config.h (header file to configure usb communication)
- usb_descriptors.c (source file for usb communication)
Click Next
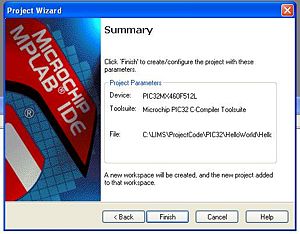
- Click Finish
We have now created the Bootloader Project.
Creating Bootloader Hex File
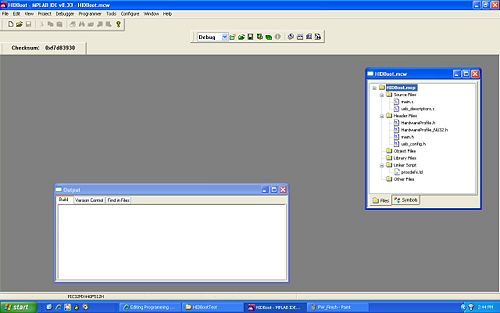
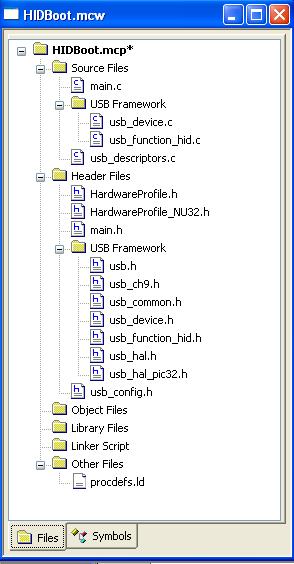
After clicking finish, MPLAB should appear as below. The project window which contains all of the files you have added to the project. The procdefs.ld file is located under the linker file folder. This file is not the only linker file, so it needs to be moved (dragged) to the 'Other Files' folder. The procdefs.ld file tells the programmer or bootloader where to put the files. The bootloader will have a different procdefs file than the files you will load with the bootloader because you want the new programs to be put in a different spot than the bootloader on the PIC. If you use the same procdefs file as the bootloader procdefs, the bootloader will try to put the new program where the bootloader code is stored, essentially erasing the bootloader and not installing the new program. If you accidently use the bootloader procdefs file, you will have to reinstall the bootloader on the PIC.
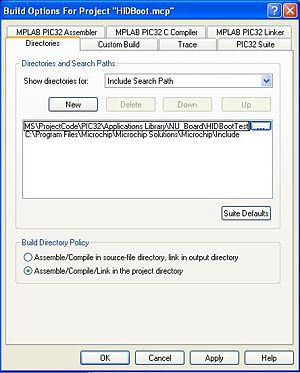
MPLAB needs to be pointed to the location of the header files of the Microchip Applications Library.
- Choose Project>Build Options>Project.
- In the directories tab, choose the Include Search Path from the drop down menu.
- Add a New path - Browse to find the include folder (<Installation Folder> \Microchip Solutions\Microchip\Include)
- Add a New path - Browse to find the folder where you have the project
- Click OK
Since the bootloader uses the USB source files of the Microchip Framework, we need to add the source files and some USB header files to the project. I put these files in sub-folders in the project window as noted below.
- In the project window, right click on 'Source Files' and click 'Create Subfolder'. I called the folder 'USB Framework'
- Right click on the new folder and select 'Add Files'
- Add the following files
- usb_device.c from ... -> Microchip Solutions -> Microchip -> USB
- usb_function_hid.c from ... -> Microchip Solutions -> Microchip -> USB -> HID Device Driver
- In the project window, right click on 'Header Files' and click 'Create Subfolder'. I called the folder 'USB Framework'
- Right click on the new folder and select 'Add Files'
- Add the following files from ... -> Microchip Solutions -> Microchip -> Include -> USB
- usb.h
- usb_ch9.h
- usb_common.h
- usb_device.h
- usb_function_hid.h
- usb_hal.h
- usb_hal_pic32.h
Since we have a generic HardwareProfile we need to tell MPLAB which board we are using. We are essentially going to give MPLAB a constant that indicates which board to use.
- Choose Project -> Build Options and click on the MPLAB PIC32 C Compiler Tab
- The window for preprocessor macros is currently empty. We want to create a variable that is defined for our board. Click Add and type PIC32_NU32 if using the Northwestern PIC32 board.
- Click OK
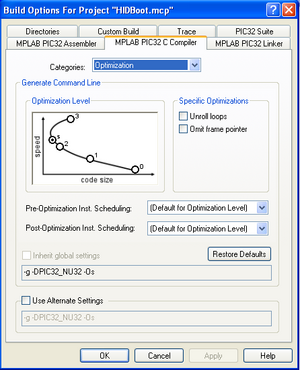
We want the Bootloader Hex file to be as small as possible to occupy the least space on the PIC. Therefore, we want to optimize the compiler to have the smallest code size. If you do not minimize the code size, the bootloader will not work.
- Click Project -> Build Options and click on the MPLAB PIC32 C Compiler Tab as before
- Click on the Category "Optimization"
- Select the dot 's' for smallest size as shown below
If you are using the PIC32_NU32, you are ready to compile the project. If you are using a board other than the PIC32_NU32, make sure you follow all the directions in Notes for Loading Bootloader with Own Board.
- Choose Project -> Build All
This compiles and creates a Hex File in the project folder to be loaded on to the PIC.
Loading Bootloader on PIC with ICD2
These directions detail how to load a file (in this case a bootloader) on the PIC with ICD2 (In Circuit-Debugger)
These directions assume the following things:
- Circuit capable of programming the PIC already exists(discussed below)
- You have an ICD2
- You already have a hex file to load (the bootloader hex file was created with the above instructions)
Hardware Setup
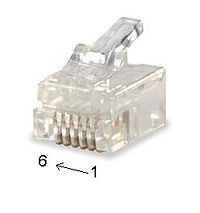
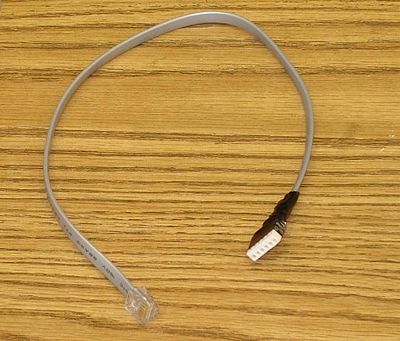
The ICD2 comes with a 6 pin modular cable (we only need 5 of the pins). This is essentially a telephone wire with 2 extra wires. This tutorial assumes that your board only has 5 pins and not the jack for this cable. The pins on the cable are arranged as shown in the picture
Take note of the colors for each pin (i.e. pin 1 is blue, pin 2 is yellow, etc.).
Cut one jack off, so that the wires are free. Solder these wires into a 5-pin header (do not solder the 6th pin) in the correct order. This will make it easier to connect the pins from the board to the cable.
The NU32 has the pins necessary for programming with ICD next to each other. Connect the pins to the correct pin of the header as detailed below
- MCLR - Pin 1
- 3.3V - Pin 2
- GND - Pin 3
- PGD - Pin 4
- PGC - Pin 5
PC Setting Up ICD2
This instructions assume you have already installed MPLAB, but have not installed the ICD2 on your computer yet.
- Connect the ICD2 to your PC with the USB cable.
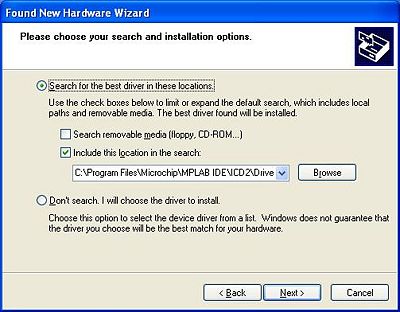
- Do not allow Windows to pick a USB driver. When the found new hardware wizard pops up, select "Install from a List or Specific Location (Advanced)". Make sure the "Search for Best Driver" is Selected and unselect "Search Removable Media". Also select "Include this location in the search". Browse to the following directory "C:\Program Files\Microchip\MPLAB IDE\ICD2\Drivers" and click Next.
- Click finish on the "Completing the Found New Hardware Wizard"
- Another "Found New Hardware Wizard" screen will appear for the Firmware Client. Follow the same steps as above.
- Connect the ICD2 with the modified jack to your board. The pins are shown again below
- MCLR - Pin 1
- 3.3V - Pin 2
- GND - Pin 3
- PGD - Pin 4
- PGC - Pin 5
If you have a program running on the PIC it will be interrupted when you connect the ICD2 to the board.
You program with the ICD2 in MPLAB. If MPLAB is not open, open MPLAB. You need to configure MPLAB to use the ICD2 programmer.
- Select Programmer -> Select Programmer -> MPLAB ICD 2.
- If a window doesn't appear, click Programmer -> MPLAB ICD2 Setup Wizard. I used the following set up features.
- USB com port
- ICD2 does NOT automatically connect
- ICD2 automatically downloads OS
You are now ready to program.
Programming with ICD2
These instructions assume you already have installed and connected the ICD2 to the board and have a hex file created.
- With the board connected to the ICD2, click Programmer -> Connect.
The output window should say something similar to this:
  Connecting to MPLAB ICD 2
  ...Connected
  Setting Vdd source to target
  Target Device PIC32MX440F512H found, revision = Rev 0x50900053
  ...Reading ICD Product ID
  Running ICD Self Test
  ...Passed
If it says:
  Connecting to MPLAB ICD 2
  ...Connected
  Setting Vdd source to target
  ICD0042: API:  Error response (Device not ready (0x12))
  ICD0042: API:  Error response (Device not ready (0x12))
  MPLAB ICD 2 ready for next operation
I find that if you turn off the board and turn it back on, it works.
- Click File ->Import and find the hex file you created above.
This imports the hex file that you want to load on to the PIC.
- Click Programmer -> Program
The output window will say something similar to this:
  Programming Target...
  ...Validating configuration fields
  ...Erasing Part
  ...Loading Program Executive
  ...Programming Boot Config (0x1FC00000 - 0x1FC003FC)
  ...Verifying Boot Config memory (0x1FC00000 - 0x1FC003FC)
  ...Programming Program Memory (0x1D000000 - 0x1D0001FC)
  ...Verifying Program memory (0x1D000000 - 0x1D0001FC)
  ...Programming Program Memory (0x1D001400 - 0x1D0017FC)
  ...Verifying Program memory (0x1D001400 - 0x1D0017FC)
  ...Programming Program Memory (0x1D002000 - 0x1D005FFC)
  ...Verifying Program memory (0x1D002000 - 0x1D005FFC)
  ...Programming Configuration Bits
  ...Verifying Config memory
  ...Programming succeeded
The programmer is still attached to the PIC, so the PIC will not be running the program you just loaded.
- Click Programmer ->Release from Reset
Unfortunately, the ICD2 sometimes crashes MPLAB with PIC32. If we had ICD3 in the lab, I would use that one instead.
The bootloader is now installed on the PIC.
If getting started click here to return to the instructions.
See Directions to Load Files to PIC32 with HID Bootloader
Notes for Loading Bootloader with Own Board
If you are loading a bootloader with a board that is not included in the HardwareProfile header file. You will need to do the following tasks.
- Define a board constant in MPLAB PIC32 C Compiler Tab in Project -> Build options (ex. PIC32_NU32)
- Put the following line in the HardwareProfile under the correct compiler (ex __C32__) and PIC (ex __32MX460F512L__)
  #elif defined(YOUR_BOARD_CONSTANT)
     #include "YOUR_HARDWAREPROFILE.h"
where YOUR_BOARD_CONSTANT is the constant you put in the compiler tab and YOUR_HARDWAREPROFILE.h is the profile header file for your board.
- In main.c, you will need to add a section for the configuration bits for your board as shown below:
  #elif defined(YOUR_BOARD_CONSTANT)
     the configuration...
