Difference between revisions of "Directions for Starting New MPLAB Project"
From Mech
Jump to navigationJump to searchAndrew Long (talk | contribs) |
Andrew Long (talk | contribs) |
||
| Line 3: | Line 3: | ||
* Choose <i>Configure>Select Device</i>. In the Device dialog, select the PIC you are using from the list if it’s not already selected. The lights show which software is supported for that PIC. |
* Choose <i>Configure>Select Device</i>. In the Device dialog, select the PIC you are using from the list if it’s not already selected. The lights show which software is supported for that PIC. |
||
[[Image:MPLAB_DeviceConfigure.bmp|thumb|300 px|left]] |
[[Image:MPLAB_DeviceConfigure.bmp|thumb|300 px|left]] |
||
<br clear=all> |
|||
* Choose <i>Project>Project Wizard</i>. Click <b>Next</b> |
* Choose <i>Project>Project Wizard</i>. Click <b>Next</b> |
||
[[Image:MPLAB_ProjectWizardStart.bmp|thumb|300 px|left]] |
[[Image:MPLAB_ProjectWizardStart.bmp|thumb|300 px|left]] |
||
<br clear=all> |
|||
* Select the device from the drop down menu. Click <b>Next</b> |
* Select the device from the drop down menu. Click <b>Next</b> |
||
[[Image:MPLAB_ProjectWizardDevice.bmp|thumb|300 px|left]] |
[[Image:MPLAB_ProjectWizardDevice.bmp|thumb|300 px|left]] |
||
<br clear=all> |
|||
* Select the Microchip PIC32 C-Compiler Toolsuite from the drop down menu. Click <b>Next</b> |
* Select the Microchip PIC32 C-Compiler Toolsuite from the drop down menu. Click <b>Next</b> |
||
[[Image:MPLAB_ProjectWizardToolsuite.bmp|thumb|300 px|left]] |
[[Image:MPLAB_ProjectWizardToolsuite.bmp|thumb|300 px|left]] |
||
<br clear=all> |
|||
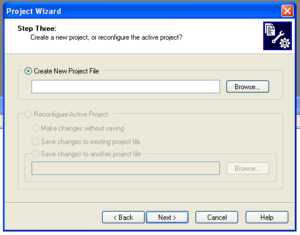
* Create a new project in the folder where you want the project and c files to be stored. Click <b>Next</b> |
* Create a new project in the folder where you want the project and c files to be stored. Click <b>Next</b> |
||
[[Image:MPLAB_ProjectWizardNewProject.bmp|thumb|300 px|left]] |
[[Image:MPLAB_ProjectWizardNewProject.bmp|thumb|300 px|left]] |
||
<br clear=all> |
|||
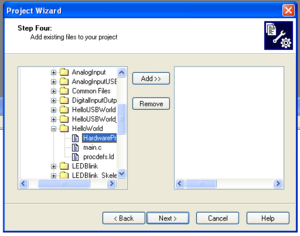
* Add the c files (if you already have some) in the folder to your project. Click <b>Next</b> |
* Add the c files (if you already have some) in the folder to your project. Click <b>Next</b> |
||
[[Image:MPLAB_ProjectWizardAddFiles.bmp|thumb|300 px|left]] |
[[Image:MPLAB_ProjectWizardAddFiles.bmp|thumb|300 px|left]] |
||
<br clear=all> |
|||
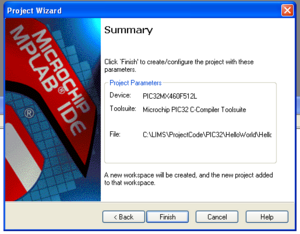
* Click <b>Finish</b> |
* Click <b>Finish</b> |
||
[[Image:MPLAB_ProjectWizardFinish.bmp|thumb|300 px|left]] |
[[Image:MPLAB_ProjectWizardFinish.bmp|thumb|300 px|left]] |
||
<br clear=all> |
|||
Revision as of 14:17, 10 July 2009
- Open MPLAB IDE.
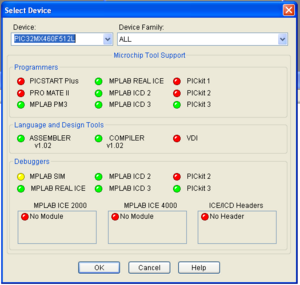
- Choose Configure>Select Device. In the Device dialog, select the PIC you are using from the list if it’s not already selected. The lights show which software is supported for that PIC.
- Choose Project>Project Wizard. Click Next
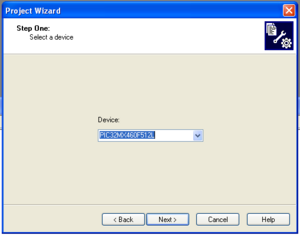
- Select the device from the drop down menu. Click Next
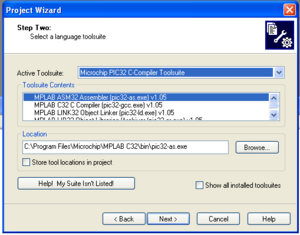
- Select the Microchip PIC32 C-Compiler Toolsuite from the drop down menu. Click Next
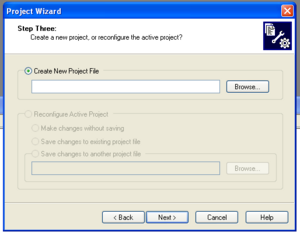
- Create a new project in the folder where you want the project and c files to be stored. Click Next
- Add the c files (if you already have some) in the folder to your project. Click Next
- Click Finish
