Difference between revisions of "NU32v2: Nokia 5110 LCD"
NickMarchuk (talk | contribs) |
NickMarchuk (talk | contribs) |
||
| Line 43: | Line 43: | ||
== Sample Code == |
== Sample Code == |
||
Initialize and clear the LCD: |
|||
<code><pre> |
<code><pre> |
||
LcdInitialize(); |
|||
LcdClear(); |
|||
</pre></code> |
|||
Go to the leftmost side of the screen on the second line and write 'Hello' |
|||
<code><pre> |
|||
gotoXY(0,1); |
|||
LcdString("Hello"); |
|||
</pre></code> |
</pre></code> |
||
Write the value in a variable: |
|||
<code><pre> |
|||
char str[5]; |
|||
sprintf(str, "i=%d", i); |
|||
LcdString(str); |
|||
</pre></code> |
|||
Turn on a pixel at (20,35): |
|||
<code><pre> |
|||
setPixel(20,35,1); |
|||
</pre></code> |
|||
== More Information == |
== More Information == |
||
Revision as of 16:26, 2 February 2011
*** UNDER CONSTRUCTION ***
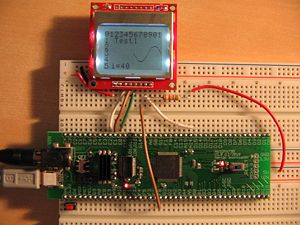
The Nokia 5110 from Sparkfun is a 84 x 48 pixel monochrome LCD and breakout board. It is controlled using SPI communication and several digital outputs.
Overview
An LCD is a convenient tool for communication data using text. The Nokia 5110 provides 6 rows of 12 characters of text, or can be used to draw in a 84 x 48 pixel space. The contrast is digitally controlled and 4 white LEDs behind the LCD provide a backlight.
The LCD requires five communication pins from a microcontroller: SPI CLK and SDO, and three digital outputs. The LCD is powered with 3.3V.
Details
Example schematic when communicating with the NU32v2:
- LCD 1-Vcc -----> NU32v2 3.3V
- LCD 2-GND -----> NU32v2 GND
- LCD 3-SCE -----> NU32v2 E2
- LCD 4-RST -----> NU32v2 E1
- LCD 5-D/C -----> NU32v2 E0
- LCD 6-DNK(MOSI) -----> NU32v2 F8 (SDO3)
- LCD 7-SCLK -----> NU32v2 D15 (SCK3)
- LCD 8-LED -----> 330 ohm -----> 5V
- Note: hooking up 8-LED is only required if you want to use the backlight
Library Functions
Code: Nokia5110.h, Nokia5110.c Full example: All example code
Nokia5110.h sets up control pins on E0, E1 and E2. These may be changed if desired. The file also contains function prototypes, constants, and a 96 x 5 element lookup array of ASCII characters.
Nokia5110.c contains the following functions:
- LcdCharacter - used to write an individual ASCII character
- LcdClear - clears the entire LCD
- LcdInitialize - Initializes SPI3 (can be changed if desired) and sends the startup commands to the LCD
- The second command sent (LCD Vop) sets the contrast of the LCD and can be altered for more or less contrast
- LcdString - writes a string of characters to the LCD
- LcdWrite - sends individual commands to the LCD
- Sending commands before the LCD is ready for them will make the LCD miss them, so 1000 Nop()s are called between commands
- gotoXY - places the cursor at an x pixel (0-84) and y character (0-5)
- setPixel - turns on a pixel at x (0-84) and y (0-48)
Sample Code
Initialize and clear the LCD:
  LcdInitialize();
  LcdClear();
Go to the leftmost side of the screen on the second line and write 'Hello'
  gotoXY(0,1);
  LcdString("Hello");
Write the value in a variable:
  char str[5];
  sprintf(str, "i=%d", i);
  LcdString(str);
Turn on a pixel at (20,35):
setPixel(20,35,1);
