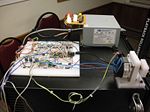
Can Launching Fridge
Overview
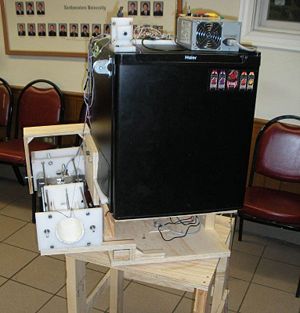
The can launching fridge is a fully automated and self contained unit designed to dispense and throw a can to a predetermined location when commanded by the user. The concept was inspired by a project done by John W. Cornwell of Duke University.
Team Members
- Derek Siegal (Mechanical Engineering, Class of 2010)
- Chris Semple (Mechanical Engineering, Class of 2011)
- Leland Gossett (Biomedical Engineering, Class of 2011)
Mechanical Design
Our design consists of three main components in addition to the refrigerator: a rotating base and stand, a launcher assembly, and an internal magazine for dispensing cans. It was decided early in the design process that we preferred a spring powered linear launch mechanism to the catapult system employed by the example mentioned above. This was for several reasons. Most importantly, this system allows for control of three parameters – launch direction, elevation angle, and power – for precise tuning and variability of the launch sequence.
Launcher Assembly
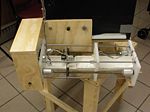
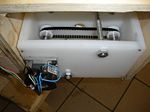
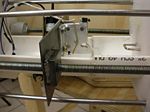
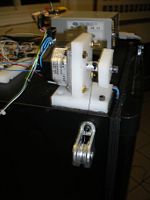
The launcher assembly is built around a polyethylene front plate connected by four steel guide rods to a box in the rear that serves as a motor mount and housing for a timing belt drive. This motor, in our case a **INSERT MOTOR SPECIFICS** stepper motor was used to turn two lead screws that run parallel and outside of the guide rods. A steel carriage plate is threaded onto these lead screws to create a linear drive capable of running the length of the assembly. In order to get smooth and reliable motion from the lead-screw drive, the alignment of the carriage had to be adjustable and the rotation had to be unimpeded. This was accomplished by machining aluminum couplers that were 3/8” - 16 threaded female on one end and exposed 1/4” rod on the other to insert into bearings. This allowed for the threaded rods to be threaded into or out of the couplers for alignment purposes, while still maintaining a constant available length. Under this was suspended half of a PVC pipe that supports the can to be launched. Finally, a launch plate is mounted on the guide rods such that it can slide freely over the pipe and these rods in the direction of launch. In action, the carriage brings forward a trigger which locks onto the rear of the launch plate. Having done so, it retracts a preset distance to store energy in the springs, and finally releases the trigger to launch the can.
Triggering the Launch Plate/Firing the Can
Controlling the Launch Angle
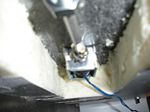
The whole launch assembly is mounted to the side of the refrigerator with a rear pivot point to allow cans to be gravity fed into the top of it. The launch angle is adjusted by angling this whole assembly upwards with a winch mounted on the top of the refrigerator. Though the motor for this winch was also a stepper motor, we decided to use a potentiometer for positional feedback to prevent accumulation of error through subsequent runs.
Controlling the Direction
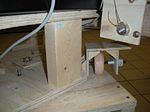
Next, a system was needed to aim the direction of launch. This is accomplished in our design by mounting the entire refrigerator on top of a turntable. This consists of a Lazy Susan bearing bolted between two plates. The first of which was bolted to the bottom of the refrigerator, while the second was elevated off the ground by a wooden frame to help reduce power required for reasonable launch trajectories. Rotation was achieved by a friction wheel driven by a small DC motor attached to the outside of the turntable plate. As with the launcher assembly, position was determined by coupling a potentiometer between the two plates.
The Magazine
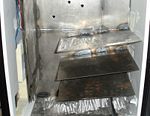
Finally, a magazine was built to feed cans into the launching tube. Placing a premium on capacity, we decided to utilize a gravity fed system essentially consisting of parallel angled plates that act as shelves for cans to rest on as they progressively feed towards an opening cut out of the refrigerator wall. All of the upper plates were cut shorter than the bottom-most one, so that a space is left for cans to roll onto the lowest plate and eventually out the opening. This magazine was welded together out of plate steel, and features a two stage loading gate. The first uses a relatively powerful and long draw solenoid that is able to overcome the friction inherent in supporting the weight of a full magazine of cans, while the second is much lighter and is positioned at the opening for the final release. This design was motivated by two considerations: first, that a single gate system would require significant tuning to time the release of only a single can, and second, that cans would potentially feed at different speeds depending on the amount of cans loaded at any given point. By using a two stage system, only enough space is permitted for one can to roll past stage one while it is open, and once stage two opens, the can will be released from a consistent distance to prevent irregularities in the sequence.
Circuit Design
C Program
Download the full code HERE.
The main control code can be found below:
//**************************************************************************************//
//******************************* BEER LAUNCHING FRIDGE ********************************//
//*******************************  ME 333 FINAL PROJECT ********************************//
//*******************************    March 19, 2010     ********************************//
//*******************************     Derek Siegal      ********************************//
//*******************************    Leland Gossett     ********************************//
//*******************************     Chris Semple      ********************************//
//**************************************************************************************//
//**************************************************************************************//
//****    This program receives a command (logic high on a CASE PIN) and then       ****//
//****    determines which case and the physical location that case corresponds     ****//
//****    to and then actuates three motors and three solenoids to do the           ****//
//****    following:                                                                ****//
//****        1) cock back a launch plate                                           ****//
//****        2) rotate the fridge to a predetermined launch angle                  ****//
//****        3) load a beer onto the launch pad                                    ****//
//****        4) winch up a launch pad to a predetermined angle                     ****//
//****        5) fire the beer by releasing the launch plate                        ****//
//****        6) return to a home position and wait for another command             ****//
//**************************************************************************************//
//**************************************************************************************//


//--------------------- INCLUDES -------------------------------------------------------
#include "HardwareProfile.h"
#include "HardwareProfile_NU32.h"
#include "stdlib.h"
#include "plib.h"
#include "string.h"
#include "stdio.h"
#include "LCD.h"
#include "motor.h"
#include "Compiler.h"


//--------------------- DEFINED CONSTANTS -------------------------------------------------------
#define ANGLE2VALUE (3.3*1024/270/2)
#define UP 1
#define DOWN (-1)
#define LEFT  1
#define RIGHT (-1)
#define NONE  0			// NMotor Error
#define FORWARD 1
#define BACKWARD (-1)
#define YES 1
#define NO 0
#define DC_STOP_POINT  (0 * ANGLE2VALUE)
#define UP_SPEED        200
#define DOWN_SPEED      300
#define FORWARD_SPEED   500
#define BACKWARD_SPEED_FAST  350
#define BACKWARD_SPEED_SLOW  150
#define START_SPEED		     25
#define HOME 0
#define STEPS_TO_INCHES  3200

//--------------------- GLOBAL VARIABLES -------------------------------------------------------
int motor1_phase;			// Winching Motor
int motor2_phase;			// Cocking Motor
int Per1; 					// Winching Motor
int Per2;					// Cocking Motor

unsigned short int elevations[3];			// vector of possible elevations, like [FLAT 15 35]
short int rotations[3];						// vector of possible rotations, like [STRAIGHT 15 -15]
unsigned short int powers[3];				// vector of possible launch strengths, like [NONE 4inches 6inches]
unsigned short int positions[2];			// [rotation; elevation]
signed short int home_position[2];			// initial potentiometer readings at startup for elevation and rotation

signed int errors[3];			// sign of the error [rotation; elevation] if the target is up, the error indicates up
int error_mag[3];				// magnitude of the error
int scenario = -1;				// which location do i want the beer at
int step_counter = 0;			// how many steps has the cocking motor taken
int quit = 0;					// am i ready to quit?
int isLatched = NO;				// YES (1) if the launch plate and cocking carriage are coupled
int step_counter2 = 0;			// For 2nd stepper, CURRENTLY NOT USED


//--------------------- Function Declarations -------------------------------------------------------
void fillCases();				// Fill elevations, rotations and powers vectors
void homePositionFill();		// Fills home_position
void getPositions();			// Get current elevation and rotation, then set error and error_mag
void getScenario();				// Program sits in this function until triggered to provide beer
void loadBeer();				// Trigger solenoid to allow one beer out onto launcher
void fire();					// Trigger firing solenoid
void loadChamber();				// Trigger large solenoid to allow one beer into storage chamber
void return_home();				// sets elevation to flat, rotation to straight


//------------------ MAIN FUNCTION -----------------------------------------------------------------
int main()
{
	// Initialize the PIC
	mInitAllLEDs();						// Flash to show startup
	homePositionFill();					// Find Home position
	fillCases();						// Fill positions and elevations
	InitMotor1();						// Initialize Motor 1
	InitMotor2();						// Initialize Motor 2
	InitDCMotors();						// Intialize DC Motors
	InitSolenoids();					// Initialize the solenoids
	motor1_phase = 0;					// Start at 0
	motor2_phase = 0;					// Start at 0


	while (1) 			// Infinite Loop
	{
		scenario = -1;
		CASE_1 == 0;
		CASE_2 == 0;

		// Determine Case
		while (scenario == -1)
		{
			getScenario();		// CALL EVENT occurs here
		}


		// Enable Interupts
		INTEnableSystemMultiVectoredInt();
		mT3SetIntPriority( 7); 	// set Timer3 Interrupt Priority
		mT3ClearIntFlag(); 		// clear interrupt flag
		mT3IntEnable( 1);		// enable timer3 interrupts ?
		mT2SetIntPriority( 6); 	// set Timer3 Interrupt Priority
		mT2ClearIntFlag(); 		// clear interrupt flag
		mT2IntEnable( 1);		// enable timer2 interrupts


		// Start Motors
		getPositions();  											// Get the current position and errors
		Turn(errors[0]);											// start turning the fridge
		Per2 = (80000000/START_SPEED)/256-1;						// start the motor at a slow speed to engage lead screw drive
		OpenTimer2(T2_ON | T2_PS_1_256 | T2_SOURCE_INT, Per2);		// start cocking motor
		Delayms(50);												// delay then:
		Per2 = (80000000/FORWARD_SPEED)/256-1;						// calculate new speed
		WritePeriod2(Per2);											// speed up the motor

		while(errors[2] != NONE)  // while launcher isn't cocked
		{
			getPositions();						// get current error
			if (errors[0] == NONE) 	Brake();	// if it's in position, stop the motor
			if (errors[2] == NONE) 				// same here
			{
				CloseTimer2();					// stop the interrupt
				motor2_enable = 0;				// this wasn't working very well, so
				StepMotor2(6);					// this line was added
			}
		}

		loadBeer();			// Load a beer
		Delayms(1500);		// Wait to let it settle

		motor1_enable = 1;											// Enable winching motor
		Per1 = (80000000/UP_SPEED)/256-1;							// Calculate winching speed
		OpenTimer3(T3_ON | T3_PS_1_256 | T3_SOURCE_INT, Per1);		// Start the motor

		while (errors[1] == UP)   // While Winching UP
		{
			getPositions(); 							// Get current position and error
			if (errors[1] == NONE)	CloseTimer3();		// stop stepping when its in position
		}

		fire();					// Fire the beer
		Delayms(3000);			// Wait a bit

		step_counter = 0;		// Reset step counter to 0
		return_home();			// Go to home position
		loadChamber();			// Load chamber

		// Turn off all LEDS
		mLED_0_Off();
		mLED_1_Off();
		mLED_2_Off();
		mLED_3_Off();

		// Turn on LED 0 to indicate ready to fire again
		mLED_0_On();
		isLatched = NO;
	}  // End of infinte while loop

} // end of main


//-------------------------------- INTERRUPTS --------------------------------------

// WINCHING MOTOR
void __ISR( _TIMER_3_VECTOR, ipl7) T3Interrupt( void)
{
	motor1_phase += errors[1];
	step_counter2 ++;
	if (motor1_phase > 3) motor1_phase = 0;
	else if (motor1_phase < 0) motor1_phase = 3;
	StepMotor1(motor1_phase);
	mT3ClearIntFlag();
}


// COCKING MOTOR
void __ISR( _TIMER_2_VECTOR, ipl6) T2Interrupt( void)
 {
	if (isLatched == YES) step_counter ++;
	motor2_phase += errors[2];
	if (motor2_phase > 3) motor2_phase = 0;
	else if (motor2_phase < 0) motor2_phase = 3;
	StepMotor2(motor2_phase);
	mT2ClearIntFlag();
}


//----------------------------------- INITIALIZING FUNCTIONS -----------------------------
void homePositionFill()  // OPEN THE ADC AND STORE CURRENT VOLTAGES AS THE 'HOME READING'
{
	CloseADC10();

				// Turn module on | output in integer | trigger mode auto | enable  autosample
	#define PARAM1  ADC_MODULE_ON | ADC_FORMAT_INTG | ADC_CLK_AUTO | ADC_AUTO_SAMPLING_ON

		// ADC ref external    | disable offset test    | enable scan mode | perform 2 samples | use one buffer | use MUXA mode
    	#define PARAM2  ADC_VREF_AVDD_AVSS | ADC_OFFSET_CAL_DISABLE | ADC_SCAN_ON | ADC_SAMPLES_PER_INT_2 | ADC_ALT_BUF_OFF | ADC_ALT_INPUT_OFF

	// 				  use ADC internal clock | set sample time
	#define PARAM3  ADC_CONV_CLK_INTERNAL_RC | ADC_SAMPLE_TIME_15

					// set AN4 and AN5
	#define PARAM4	ENABLE_AN4_ANA | ENABLE_AN5_ANA


	// do not assign channels to scan
	#define PARAM5	SKIP_SCAN_AN0 | SKIP_SCAN_AN1 | SKIP_SCAN_AN2 | SKIP_SCAN_AN3 | SKIP_SCAN_AN6 | SKIP_SCAN_AN7 | SKIP_SCAN_AN8 | SKIP_SCAN_AN9 | SKIP_SCAN_AN10
       | SKIP_SCAN_AN11 | SKIP_SCAN_AN12 | SKIP_SCAN_AN13 | SKIP_SCAN_AN14 | SKIP_SCAN_AN15

	SetChanADC10( ADC_CH0_NEG_SAMPLEA_NVREF); // use ground as the negative reference
	OpenADC10( PARAM1, PARAM2, PARAM3, PARAM4, PARAM5 ); // configure ADC using parameter define above
	EnableADC10(); // Enable the ADC

	while ( ! mAD1GetIntFlag() ) { } // wait for the first conversion to complete so there will be valid data in ADC result registers

	mInitAllLEDs();

	home_position[0] = ReadADC10(0);
	home_position[1] = ReadADC10(1);

}


// ASSIGN STANDARD POSITIONS
void fillCases()
{
	rotations[HOME] = home_position[0];								// Sets straight to startup position
	rotations[1] = (float) 10 *  ANGLE2VALUE + home_position[0];	// rotations[1] = 10 degrees left
	rotations[2] = (float) -10 * ANGLE2VALUE + home_position[0];	// rotations[2] = 10 degrees right
	elevations[HOME] = home_position[1];							// Sets flat to startup position
	elevations[1] = (float) 5 *  ANGLE2VALUE + home_position[1];	// elevations[1] = 5 degrees up
	elevations[2] = (float) 15 *  ANGLE2VALUE + home_position[1];	// elevations[2] = 15 degrees up
	powers[HOME] = 0;		// not cocked back
	powers[1] = 6 * STEPS_TO_INCHES;		// powers[1] = 6 inches
	powers[2] = 7 * STEPS_TO_INCHES;		// powers[2] = 7 inches
}


// -------------------------------------- LOCATING FUNCTIONS --------------------------------
void getPositions()
{
	// Get current position
	positions[0] = ReadADC10(0);
	positions[1] = ReadADC10(1);

	// Calculate error magnitude
	error_mag[0] = positions[0] - rotations[scenario];
	error_mag[1] = positions[1] - elevations[scenario];

	// Set motor direction for rotational motor
	if (abs(error_mag[0]) < DC_STOP_POINT)
	{
		errors[0] = NONE;

	}
	else if (error_mag[0] < 0)
	{
		errors[0] = LEFT;

	}
	else if (error_mag[0] > 0)
	{
		errors[0] = RIGHT;

	}


	// Set motor direction for winching motor
	if (abs(error_mag[1]) == 0) errors[1] = NONE;
	else if (error_mag[1] < 0)
	{
		errors[1] = UP;
	}
	else if (error_mag[1] > 0)
	{
		errors[1] = DOWN;
	}


	// Set motor direction for cocking motor
	if (isLatched == NO) // if plates arent attached, move forward until they are
	{
		if (LatchSwitch == 0) 	errors[2] = FORWARD;
		else if (LatchSwitch == 1)
		{
			isLatched = YES;
			Per2 = (80000000/BACKWARD_SPEED_FAST)/256-1;
			WritePeriod2(Per2);
			errors[2] = BACKWARD;
		}
	}
	else // if they are latched, count steps backward and compare
	{
		error_mag[2] = step_counter - powers[scenario];
		if (error_mag[2] == 0)
		{
			errors[2] = 0;
		}
		else
		{
		 	errors[2] = BACKWARD;
		}
	}

}


void getScenario() // get 'beer me' command and determine position
{

	while (scenario == -1)
	{
		if (CASE_1 == 1) scenario = 1;
		else if (CASE_2 == 1) scenario = 2;
	}

}


// ---------------------- END OF SEQUENCE FUNCTIONS --------------------------------------
void return_home()
{
	// Set scenario to home and compute error
	scenario = HOME;
	getPositions();

	// START WINCHING DOWN
	Per1 = (80000000/DOWN_SPEED)/256-1;
	mT3SetIntPriority( 7); 	// set Timer3 Interrupt Priority
	mT3ClearIntFlag(); 		// clear interrupt flag
	mT3IntEnable( 1);		// enable timer3 interrupts ?
	OpenTimer3(T3_ON | T3_PS_1_256 | T3_SOURCE_INT, Per1);

	while (errors[1] != NONE) // STOP WHEN IT GETS THERE
	{
		if (errors[0] == NONE) Brake();
		if (ElevSwitch == 1)
		{
			CloseTimer3();
			motor1_enable = 0;
			StepMotor1(6);
		}
	}
}
