Difference between revisions of "Ball Balancing Challenge"
| Line 77: | Line 77: | ||
==Software Design== |
==Software Design== |
||
Source Code: |
|||
<pre> |
|||
/* |
|||
touchscreen.c Mechatronics 333 Team 14 2/22/08 |
|||
Reads the touchscreen individually as two axes. Actuates motor based on either touchscreen or joystick control. |
|||
PIC powers either the Upper Left (Y-axis reading) or the Lower Right (X-axis reading) and grounds what it doesn't power. |
|||
Output reading is the value on that axis. |
|||
Two channels of PWM output, with the PWM2 output moved from pin 16 to pin 36 to avoid conflict with Timer1 input |
|||
Upper Left (UL) corner is PIN_C1, and Lower Left (LR) corner is always its inverse. |
|||
Upper Right (UR) corner is always high, and lower right (LL) is always ground, its inverse. |
|||
Peak voltage: Top reading voltage=4V and bottom reading voltage=1.2V |
|||
Min xread,yread values: 62,70 |
|||
Max xread,yread values: 189,177 |
|||
*/ |
|||
#include <18f4520.h> |
|||
#DEVICE ADC=8 // set ADC to 8 bit accuracy |
|||
#fuses HS,NOLVP,NOWDT,NOPROTECT, CCP2B3 // CCP2B3 moves PWM2 output to pin 36 (RB3) rather than pin 16 (RC1) |
|||
#device icd=true |
|||
#use delay(clock=20000000) |
|||
int yread,xread,m,j=0; |
|||
int read1pwm,read2pwm=0; |
|||
int read1,read2=0; |
|||
int coin,strike,ball=0; |
|||
signed int16 counter=0; |
|||
void buzz(); |
|||
void main() { |
|||
for (j=0;j<3;j++){ |
|||
output_d(0b11111111); |
|||
delay_ms(250); |
|||
output_d(0); |
|||
delay_ms(250); |
|||
} |
|||
coin=0; |
|||
strike=0; |
|||
ball=0; |
|||
counter=0; |
|||
output_high(PIN_C1); //Start with UL high, LR low ***THESE WILL CHANGE*** |
|||
output_high(PIN_C0); //This is the pin for UR. It will be run through an inverter for LL |
|||
//the bottom left corner. ***THESE ARE PERMANENT*** |
|||
setup_adc_ports(AN0_TO_AN2); // Enable analog inputs; choices run from just AN0, up to AN0_TO_AN11 |
|||
setup_adc(ADC_CLOCK_INTERNAL); // the range selected has to start with AN0 |
|||
setup_timer_2(T2_DIV_BY_4, 77, 16); // clock at 16KHz, interrupt every 4*50nS * 4 * (155+1) * 16 = 2.00mS |
|||
enable_interrupts(INT_TIMER2); |
|||
enable_interrupts(GLOBAL); |
|||
setup_ccp1(CCP_PWM); // PWM output on CCP1/RC2, pin 17 this goes to y-axis motor |
|||
setup_ccp2(CCP_PWM); // PWM output on CCP2/RB3, pin 36 this goes to x-axis motor |
|||
set_pwm1_duty(39); |
|||
set_pwm2_duty(39); |
|||
while (TRUE) { |
|||
set_pwm1_duty(39); |
|||
set_pwm2_duty(39); |
|||
//Wait for coin to be inserted |
|||
while (coin==0) { |
|||
if (input(PIN_E1)) coin=1; |
|||
else delay_ms(100); |
|||
} |
|||
//Gameplay begins. Controls go dead when strikes go too high; |
|||
while (coin==1) { |
|||
//TOUCHSCREEN READing, looks at the touchscreen readings |
|||
if (m==0) { |
|||
output_high(PIN_C1); //UL goes high, thus LR goes low; y-axis can be read |
|||
set_adc_channel(0); |
|||
delay_us(10); |
|||
yread = read_adc(); //Read y axis |
|||
m++; |
|||
} |
|||
else { |
|||
output_low(PIN_C1); //UL goes low, thus LR goes high; x-axis can be read |
|||
set_adc_channel(0); |
|||
delay_us(10); |
|||
xread = read_adc(); //Read x axis |
|||
m=0; |
|||
} |
|||
//Check to see if the Ball is outide the allowed range of values to be "in the black" of the touchscreen |
|||
if ((yread< 90) | (yread >150) | (xread <90) | (xread > 150)) { |
|||
counter++; |
|||
if ((counter==3) && (strike==ball)) { |
|||
strike++; //If ball is "in the red" for a sufficiently long time, a strike is added. |
|||
} |
|||
} |
|||
else { |
|||
counter--; |
|||
//Check to see if the ball has returned from being "in the red." |
|||
if ((counter==-1) && (strike>ball)) { |
|||
ball++; |
|||
} |
|||
} |
|||
if ((counter==3) | (counter == -2)) counter=0; |
|||
if (strike==2) { |
|||
output_high(PIN_A3); |
|||
} |
|||
if (strike==3) { |
|||
output_high(PIN_A4); |
|||
} |
|||
if (strike==4) { |
|||
output_high(PIN_A5); |
|||
} |
|||
if (strike==5) { |
|||
output_high(PIN_E2); |
|||
} |
|||
if (strike==6) { |
|||
output_high(PIN_E0); |
|||
set_pwm1_duty(39); |
|||
set_pwm2_duty(39); |
|||
buzz(); |
|||
} |
|||
//Joystick Control |
|||
if (input(PIN_C7) != 0) { // toggle switch that switches between Joystick control system and Touchscreen control system |
|||
set_adc_channel(2); // there's only one ADC so select which input to connect to it; here pin AN1 |
|||
delay_us(10); // wait 10uS for ADC to settle to a newly selected input |
|||
read1 = read_adc(); //x-axis |
|||
if (read1<145 && read1>115) read1pwm=39; |
|||
else read1pwm=(read1*.3); |
|||
set_pwm1_duty(read1pwm); |
|||
set_adc_channel(1); // there's only one ADC so select which input to connect to it; here pin AN2 |
|||
delay_us(10); // wait 10uS for ADC to settle to a newly selected input |
|||
read2 = read_adc(); //y-axis |
|||
if (read2<145 && read2>115) read2pwm=39; |
|||
else read2pwm=(read2*.3); |
|||
set_pwm2_duty(read2pwm); |
|||
} |
|||
else { |
|||
output_d(0); |
|||
set_pwm1_duty(39); |
|||
set_pwm2_duty(39); |
|||
} |
|||
//LED readings for XY locations of the touchscreen |
|||
if (xread<75) { |
|||
output_low(PIN_D0); |
|||
output_low(PIN_D1); |
|||
output_low(PIN_D2); |
|||
output_low(PIN_D3); |
|||
} |
|||
else if (xread<110) { |
|||
output_high(PIN_D0); |
|||
output_low(PIN_D1); |
|||
output_low(PIN_D2); |
|||
output_low(PIN_D3); |
|||
} |
|||
else if (xread<145) { |
|||
output_high(PIN_D0); |
|||
output_high(PIN_D1); |
|||
output_low(PIN_D2); |
|||
output_low(PIN_D3); |
|||
} |
|||
else if (xread<180) { |
|||
output_high(PIN_D0); |
|||
output_high(PIN_D1); |
|||
output_high(PIN_D2); |
|||
output_low(PIN_D3); |
|||
} |
|||
else { |
|||
output_high(PIN_D0); |
|||
output_high(PIN_D1); |
|||
output_high(PIN_D2); |
|||
output_high(PIN_D3); |
|||
} |
|||
if (yread<75) { |
|||
output_low(PIN_D4); |
|||
output_low(PIN_D5); |
|||
output_low(PIN_D6); |
|||
output_low(PIN_D7); |
|||
} |
|||
else if (yread<110) { |
|||
output_high(PIN_D4); |
|||
output_low(PIN_D5); |
|||
output_low(PIN_D6); |
|||
output_low(PIN_D7); |
|||
} |
|||
else if (yread<145) { |
|||
output_high(PIN_D4); |
|||
output_high(PIN_D5); |
|||
output_low(PIN_D6); |
|||
output_low(PIN_D7); |
|||
} |
|||
else if (yread<180) { |
|||
output_high(PIN_D4); |
|||
output_high(PIN_D5); |
|||
output_high(PIN_D6); |
|||
output_low(PIN_D7); |
|||
} |
|||
else { |
|||
output_high(PIN_D4); |
|||
output_high(PIN_D5); |
|||
output_high(PIN_D6); |
|||
output_high(PIN_D7); |
|||
} |
|||
} |
|||
} |
|||
} |
|||
void buzz() { |
|||
coin=0; |
|||
strike=0; |
|||
ball=0; |
|||
output_low(PIN_A3); |
|||
output_low(PIN_A4); |
|||
output_low(PIN_A5); |
|||
output_low(PIN_E2); |
|||
output_low(PIN_E0); |
|||
while (input(PIN_C6)==0) { |
|||
output_high(PIN_C4); |
|||
delay_us(100); |
|||
output_low(PIN_C4); |
|||
delay_us(100); |
|||
} |
|||
} |
|||
</pre> |
|||
==Results== |
==Results== |
||
Revision as of 18:11, 20 March 2008
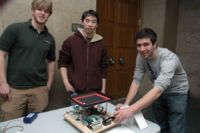
Team Members
- JJ Darling - Electrical Engineering Class of 2009
- Ben Schriesheim - Manufacturing Engineering Class of 2008
- Alex Leung - Biomedical Engineering Graduate Student
Overview
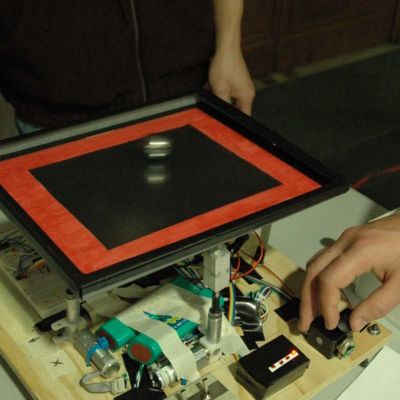
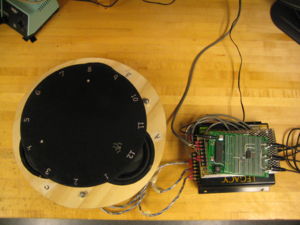
We built a horizontal circular platform that is actuated from underneath by three speakers placed in an equilateral triangle. The vibration of the platform causes a small object (e.g., an IC socket or a coin) to act as an hour "hand" on top of the platform. The object slides around the circular platform, impelled by friction forces due to the vibration. By placing the speakers at different phases and amplitudes, we got the objects to move to desired positions. Due to the nodes created by the speaker vibrations, the object will move back to the correct hour if it is moved away. Our project was given to us by Professor Colgate and was based upon the research of Professor Lynch.
Mechanical Design
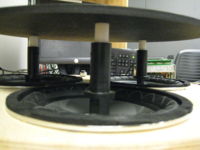
The Vibratory clock consists of a wooden base, held up by adjustable legs, three speakers, and a circular platform. The following material were used to create the design:
Base:
- wood: 16" diameter, 0.75" thick
- holes: 6" diameter (3 total)
- adjustable legs: 3 rods: 3/8"-16; 4" long; 6 nuts total
Speakers:
- 3 Pyramid Power PW677X: 300W, 4 Ohms, 6.5" Chrome Subwoofer
- previously adapted speakers replaced center of speaker with attachments 3" in height and 1/2" hole on top
- 1/2" diameter PVC used to attach previous attachment to platform with a screw
- held in place by 2 set screws each
- centers placed 7.125" apart
Circular Platform
- PVC/Acrylic: 11.75" diameter, 0.25" thick
- machined on the LaserJet
- screw holes counter-sunk at 7.125" apart
- 2.875" above wooden base
- Silver Sharpie used for numbers
Reasoning for Geometry of Design
Equilateral Triangle: By having the speakers equidistant from each other, we were able to create symmetry in our design, which made programming the various nodes much easier. For example, we were able to use the same theory to find the node at 12 o'clock, 4 o'clock, and 8 o'clock. If the speakers were not placed equidistant from each other, two speakers placed at equal amplitudes and opposite phases would not have created a sink in the exact middle of the two speakers.
Adjustable Legs:
We needed to make the legs adjustable since it is essential that the platform be perfectly level in order for the objects placed on the platform to move in expected patterns. For example, if one leg is slightly shorter than the other two, the objects placed on the platform would tend to move towards that leg and we could no longer rely on symmetry to program the various nodes due to the effects of gravity.
Height of Platform:
Through our own experimentation and from Professor Lynch's research, we found that we needed to have the pivot point (i.e. the speaker diaphragm) significantly below the platform in order to create sinks. At one point in the design process, we attempted to create a different pivot point by replacing the PVC with 1/2" outer diameter, 1/4" inner diameter Tygon 2001 tubing that only was able to bend in one point since it had stand-offs and screws inside the tube. However, this replacement in a sense created two pivot points (the speaker diaphragm and the Tygon), causing the platform to only create sources and not sinks. In addition, the different height of the pivot point may have also led to the plate acting differently.
Electrical Design
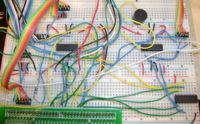
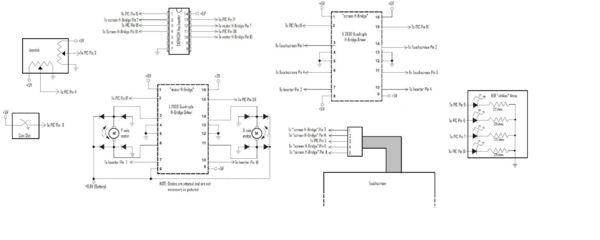
The Electical Design was fairly simple for this project. The inputs to the PIC were the joystick, coin slot, and the touchscreen. The outputs were the motors and the LED "strike" array. The touchscreen was also an output as it was controlled by the PIC.
The user would control the joystick that was simply two potentiometers that would output a value between 0V and 5V, corresponding to both the x-axis and the y-axis.
Component List:
| Part | Part No. | Qty | Vendor | Price (Total) |
|---|---|---|---|---|
| Microchip 8-bit PIC Microcontroller (U1) | PIC18F4520 | 1 | N/A | N/A |
| Quadruple Half-H Drivers | L293D | 2 | Digi-Key | $1.93 |
| Hex Inverter | SN74HC04 | 1 | Digi-Key | $0.47 |
| Touchscreen | BER237-ND | 1 | Digi-Key | $62.00 |
| Joystick | N/A | 1 | N/A | N/A |
Circuit Diagram:
Software Design
Source Code:
/*
touchscreen.c Mechatronics 333 Team 14 2/22/08
Reads the touchscreen individually as two axes. Actuates motor based on either touchscreen or joystick control.
PIC powers either the Upper Left (Y-axis reading) or the Lower Right (X-axis reading) and grounds what it doesn't power.
Output reading is the value on that axis.
Two channels of PWM output, with the PWM2 output moved from pin 16 to pin 36 to avoid conflict with Timer1 input
Upper Left (UL) corner is PIN_C1, and Lower Left (LR) corner is always its inverse.
Upper Right (UR) corner is always high, and lower right (LL) is always ground, its inverse.
Peak voltage: Top reading voltage=4V and bottom reading voltage=1.2V
Min xread,yread values: 62,70
Max xread,yread values: 189,177
*/

#include <18f4520.h>
#DEVICE ADC=8                      // set ADC to 8 bit accuracy
#fuses HS,NOLVP,NOWDT,NOPROTECT, CCP2B3      // CCP2B3 moves PWM2 output to pin 36 (RB3) rather than pin 16 (RC1)
#device icd=true
#use delay(clock=20000000)


int yread,xread,m,j=0;
int read1pwm,read2pwm=0;
int read1,read2=0;
int coin,strike,ball=0;
signed int16 counter=0;

void buzz();

void main() {
   for (j=0;j<3;j++){
      output_d(0b11111111);
      delay_ms(250);
      output_d(0);
      delay_ms(250);
   }

   coin=0;
   strike=0;
   ball=0;
   counter=0;

   output_high(PIN_C1);          //Start with UL high, LR low ***THESE WILL CHANGE***
   output_high(PIN_C0);          //This is the pin for UR. It will be run through an inverter for LL
                                 //the bottom left corner. ***THESE ARE PERMANENT***

   setup_adc_ports(AN0_TO_AN2);        // Enable analog inputs; choices run from just AN0, up to AN0_TO_AN11
   setup_adc(ADC_CLOCK_INTERNAL);      // the range selected has to start with AN0

   setup_timer_2(T2_DIV_BY_4, 77, 16);        // clock at 16KHz, interrupt every 4*50nS * 4 * (155+1) * 16 = 2.00mS

   enable_interrupts(INT_TIMER2);
   enable_interrupts(GLOBAL);

   setup_ccp1(CCP_PWM);       // PWM output on CCP1/RC2, pin 17   this goes to y-axis motor
   setup_ccp2(CCP_PWM);       // PWM output on CCP2/RB3, pin 36   this goes to x-axis motor

   set_pwm1_duty(39);
   set_pwm2_duty(39);

   while (TRUE) {

      set_pwm1_duty(39);
      set_pwm2_duty(39);

      //Wait for coin to be inserted
      while (coin==0) {
         if (input(PIN_E1)) coin=1;
         else delay_ms(100);
      }

      //Gameplay begins. Controls go dead when strikes go too high;
      while (coin==1) {
         //TOUCHSCREEN READing, looks at the touchscreen readings
         if (m==0) {
            output_high(PIN_C1);       //UL goes high, thus LR goes low; y-axis can be read
            set_adc_channel(0);
            delay_us(10);
            yread = read_adc();       //Read y axis
            m++;
         }
         else {
            output_low(PIN_C1);        //UL goes low, thus LR goes high; x-axis can be read
            set_adc_channel(0);
            delay_us(10);
            xread = read_adc();       //Read x axis
            m=0;
         }

         //Check to see if the Ball is outide the allowed range of values to be "in the black" of the touchscreen
         if ((yread< 90) | (yread >150) | (xread <90) | (xread > 150)) {
            counter++;
            if ((counter==3) && (strike==ball)) {
               strike++;         //If ball is "in the red" for a sufficiently long time, a strike is added.
            }
         }
         else {
            counter--;
            //Check to see if the ball has returned from being "in the red."
            if ((counter==-1)  && (strike>ball)) {
               ball++;
            }
         }

         if ((counter==3) | (counter == -2)) counter=0;


         if (strike==2) {
            output_high(PIN_A3);
         }
         if (strike==3) {
            output_high(PIN_A4);
         }
         if (strike==4) {
            output_high(PIN_A5);
         }
         if (strike==5) {
            output_high(PIN_E2);
         }
         if (strike==6) {
            output_high(PIN_E0);
            set_pwm1_duty(39);
            set_pwm2_duty(39);
            buzz();
         }


         //Joystick Control
         if (input(PIN_C7) != 0) {  // toggle switch that switches between Joystick control system and Touchscreen control system
            set_adc_channel(2);     // there's only one ADC so select which input to connect to it; here pin AN1
            delay_us(10);           // wait 10uS for ADC to settle to a newly selected input
            read1 = read_adc();                       //x-axis
            if (read1<145 && read1>115) read1pwm=39;
            else read1pwm=(read1*.3);
            set_pwm1_duty(read1pwm);

            set_adc_channel(1);     // there's only one ADC so select which input to connect to it; here pin AN2
            delay_us(10);           // wait 10uS for ADC to settle to a newly selected input
            read2 = read_adc();                      //y-axis
            if (read2<145 && read2>115) read2pwm=39;
            else read2pwm=(read2*.3);
            set_pwm2_duty(read2pwm);
         }
         else {
            output_d(0);
            set_pwm1_duty(39);
            set_pwm2_duty(39);
            }

         //LED readings for XY locations of the touchscreen
         if (xread<75) {
            output_low(PIN_D0);
            output_low(PIN_D1);
            output_low(PIN_D2);
            output_low(PIN_D3);
         }
         else if (xread<110) {
            output_high(PIN_D0);
            output_low(PIN_D1);
            output_low(PIN_D2);
            output_low(PIN_D3);
         }
         else if (xread<145) {
            output_high(PIN_D0);
            output_high(PIN_D1);
            output_low(PIN_D2);
            output_low(PIN_D3);
         }
         else if (xread<180) {
            output_high(PIN_D0);
            output_high(PIN_D1);
            output_high(PIN_D2);
            output_low(PIN_D3);
         }
         else  {
            output_high(PIN_D0);
            output_high(PIN_D1);
            output_high(PIN_D2);
            output_high(PIN_D3);
         }
         if (yread<75) {
            output_low(PIN_D4);
            output_low(PIN_D5);
            output_low(PIN_D6);
            output_low(PIN_D7);
         }
         else if (yread<110) {
            output_high(PIN_D4);
            output_low(PIN_D5);
            output_low(PIN_D6);
            output_low(PIN_D7);
         }
         else if (yread<145) {
            output_high(PIN_D4);
            output_high(PIN_D5);
            output_low(PIN_D6);
            output_low(PIN_D7);
         }
         else if (yread<180) {
            output_high(PIN_D4);
            output_high(PIN_D5);
            output_high(PIN_D6);
            output_low(PIN_D7);
         }
         else  {
            output_high(PIN_D4);
            output_high(PIN_D5);
            output_high(PIN_D6);
            output_high(PIN_D7);
         }
      }
   }
}

void buzz() {

   coin=0;
   strike=0;
   ball=0;
   output_low(PIN_A3);
   output_low(PIN_A4);
   output_low(PIN_A5);
   output_low(PIN_E2);
   output_low(PIN_E0);


   while (input(PIN_C6)==0) {
      output_high(PIN_C4);
      delay_us(100);
      output_low(PIN_C4);
      delay_us(100);
   }
}
Results
We were able to get our project working so that the plate moves an object placed anywhere on the plate to the correct time and then moves the objects around the clock face, acting as the hour "hand" of a clock. However, we increased the speed so that it takes about 2 minutes for objects placed on the clock to move around so that it is easy to demonstrate. Check out the working Vibratory Clock here.
Reflections
Useful Resources
Vibration-Induced Frictional Force Fields for Part Manipulation
