Difference between revisions of "Baseball"
JeremyKlem (talk | contribs) |
MingLeeChow (talk | contribs) |
||
| Line 1: | Line 1: | ||
== Team Members == |
== Team Members == |
||
'''Ming Lee Chow:''' ''Biomedical Engineering Class of |
'''Ming Lee Chow:''' ''Biomedical Engineering Class of 2008'' |
||
'''Jeremy Klem:''' ''Mechanical Engineering Class of 2008'' |
'''Jeremy Klem:''' ''Mechanical Engineering Class of 2008'' |
||
Revision as of 20:15, 19 March 2008
Team Members
Ming Lee Chow: Biomedical Engineering Class of 2008
Jeremy Klem: Mechanical Engineering Class of 2008
Overview
Mechanical Design
Play Field and Housing
|
Part |
Quantity |
|
Plywood |
~4ft^2 |
|
Wood Screws |
21 |
|
Set Screws |
10 |
|
Acrylic Board |
~2ft^2 |
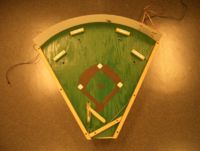
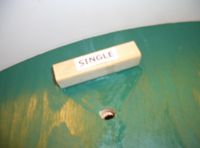
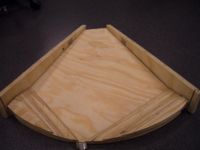
The general concept is to have a slanted surface similar to a pinball machine. The ball will roll down and the user will try to hit it back up into a single, double, triple or homerun. These "hits" have dampening backstops and milled down grooves to channel the ball into a hole where a sensor is placed. If none of these are hit then the ball rolls back down towards the bat and into an out hole. This was done to limit the number of holes and sensor we would need to create. There are rails along the play field so the ball will not fly off. Underneath, there is a recess, which is an oppositely slanted board to channel the ball back to the pitching apparatus. The housing has sides to mount the bat button and keep the ball from sliding out of the recess.
Bat
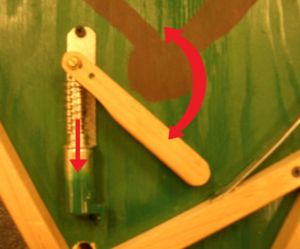
The Bat was fashioned out of wood on the band saw and sanded to a finish. Two holes were drilled: one to act as an anchoring pivot point and the other to be attached to an actuator. A solenoid, run on the two rechargeable batteries in each kit, was used with a compression spring to actuate the bat. The user interface was a simple push button usually stocked in the lab. This button was located on the right side of the game similar to where pinball buttons are located.
In order to make the game more like baseball we set up a system to only allow the user to swing during a pitched ball. To learn more about this look below to Bat Relay.
Pitcher
To actuate the ball up to a position to be "pitched" a motor and scooping arm were used. The motor was hooked up to a single rechargeable battery found in the kits. Once activated the arm turns upwards until hitting a static bar. Attached to the bar is a lever switch which sends a pulse to the PIC telling it that a pitch has been thrown. The momentum of the ball would shoot it out of the scoop where a curved ramp would project it onto the play field. The motor is attached to a simple push button so another player can pitch creating a more interactive game.
Electrical Design
PIC Schematic
Circuit Diagram
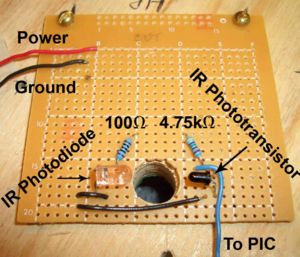
Photodiode/Phototransistor Sensor
An IR optical sensor was used to detect the ball falling through a hole.
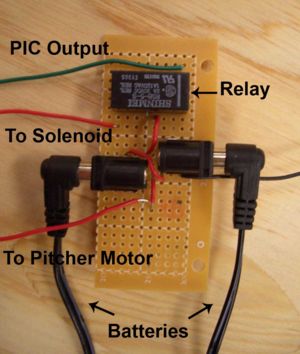
Bat Relay & Power Supplies
In order to power our solenoid and motor we needed external power. We used the 9.6V rechargeable batteries found in the lab kits. The first battery is permanently connected to the pitching motor as well as in series with the second battery. The two batteries in series are connected to the solenoid via a relay. When the PIC sends a high pulse to activate the coil the user can then activate the solenoid with the bat button. The PIC only sends a .5 second pulse, which is a little more time then is needed to pitch the ball. The PIC is activated to send this pulse when the pitching arm hits the lever switch located on the stopping bar in the back of the game (See pitching above).
Ideally, when the pitch button is activated it will turn the arm upwards and both activate the switch and pitch the ball. The relay will come on allowing the player to complete the loop on the solenoid with the bat button. Once the half second delay ends the relay closes, which means the user can no longer activate the bat. This way only one swing is allowed per pitch.
