Difference between revisions of "Basketball"
| Line 17: | Line 17: | ||
== Mechanical Design == |
== Mechanical Design == |
||
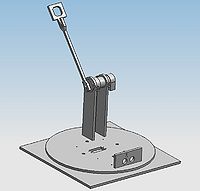
[[Image:Mechatronics2009BballCADassembly|CAD Assembly|right|thumb|200px]] |
[[Image:Mechatronics2009BballCADassembly|CAD Assembly|right|thumb|200px]] |
||
The major mechanical components are machined out of clear acrylic using the laser cutter in the machine shop. Holes were machined and threaded as required. The base is a square (12" x 12") with threaded holes for attachment to the purchased turntable bearing |
The major mechanical components are machined out of clear acrylic using the laser cutter in the machine shop. Holes were machined and threaded as required. The base is a square (12" x 12") with threaded holes for attachment to the purchased turntable bearing. The turntable has threaded holes for attachment to the turntable as well. Large holes were added to the turntable for access to the screws for attaching the base because once one of the parts is attached to the turntable, the screws would otherwise not be able to be tightened. |
||
Revision as of 15:52, 19 March 2009
<br=clear all>
Team Members
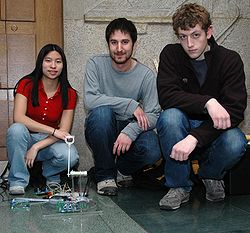
- John Rula (Mechanical Engineering, Class of 2009)
- Alex Wojcicki (Mechanical Engineering, Class of 2009)
- Meredith Chow (Electrical Engineering, Class of 2010)
Introduction
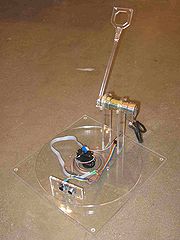
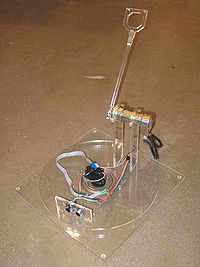
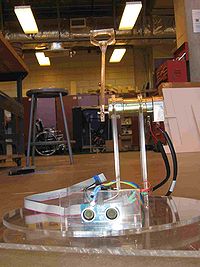
A throwing arm propelled by a Pittman motor is mounted on a turntable and throws the ball into the "hoop." The hoop is wrapped in reflective tape and an IR emitter, receiver pair is used to sense where the IR is reflected most (the hoop with highly reflective tape). An ultrasonic sensor then pings the hoop for the distance of the hoop. With this information, the arm is able to "make a basket."
Mechanical Design
The major mechanical components are machined out of clear acrylic using the laser cutter in the machine shop. Holes were machined and threaded as required. The base is a square (12" x 12") with threaded holes for attachment to the purchased turntable bearing. The turntable has threaded holes for attachment to the turntable as well. Large holes were added to the turntable for access to the screws for attaching the base because once one of the parts is attached to the turntable, the screws would otherwise not be able to be tightened.
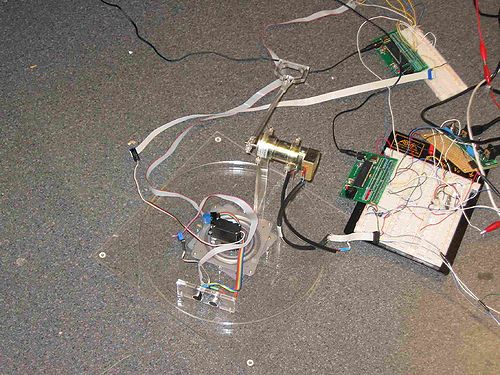
Two pieces of acrylic are used for the turntable base and the turning surface. The base is a square (12" x 12") on which the bottom of the servo is mounted. The turntable surface has a rectangle cut out of it to fit the servo motor. They are connected by the turntable. The Pittman motor clamped between two supports that are screwed on the turning surface. The sensors, IR emitter/receiver pair and ultrasonic sensor) are fitted onto a slab of acrylic that is also screwed on top of the turning surface. The arm is also made of laser cut acrylic and uses a screw that can be tightened to fasten to the motor's shaft. The hoop can be anything with the highly reflective tape around it.
Components
| Part | Part No. | Qty | Vendor | Price (Total) |
|---|---|---|---|---|
| Pittman Motor | GM8712 | 1 | Lab | - |
| RC Servo Motor - Futaba | S3004 | 1 | Lab | - |
| Acrylic .25" Thick, 24"X 24" | 8560K357 | 1 | McMaster | $39.63 |
| Corrosion-Resistant Turntable | 6031K17 | 1 | McMaster | $2.42 |
| Fasteners | - | 24 | Shop supply | - |
Electrical Design
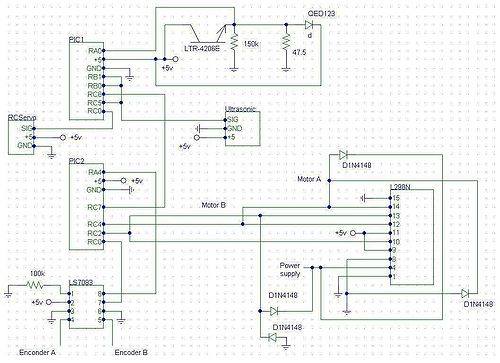
The IR pair, ultrasonic, and servo have a relatively simple circuit. The Pittman motor, H-Bridge, and encoder chip circuit is more complex. In the diagram below, the IR pair, ultrasonic, and servo are controlled by the program on PIC1. The Pittman, H-Bridge and encoder chip were run by PIC2. The two pics communicated with a common ground and wire connecting RC6 and RC7 as shown in the diagram. The power supply was two 12 volt power supplies connected in series to give a total of 24 volts.
Components
| Part | Part No. | Qty | Vendor | Price (Total) |
|---|---|---|---|---|
| PICs | PIC18F4620 | 2 | Lab | - |
| Encoder | LS7083 | 1 | Lab | - |
| H-Bridge | L298N | 1 | Lab | - |
| Ping Ultrasonic Sensor | 28015 | 1 | Lab 5 supply | - |
| IR Emitter | QED123 | 1 | Lab | - |
| IR Phototransistor | LTR-4206E | 1 | Lab | - |
| Diodes | 1N4148 | 4 | Lab | - |
| Resistors | 47.5/150K | 2 | Lab | - |
Circuit Diagram
Code
Results
In the end, the project ultimately succeeded -- baskets could be made. However, better tuning for the motor control and needs to be developed for more consistent results.
Video
Problems Encountered
- Attempting to integrate multiple pics and circuits onto one circuit board did not give good results. Ultimately, we had to use separate boards for each pic. We are not sure what the cause of this is -- perhaps it is noise.
- Motor control was an intense programming effort -- almost a project in its own right. Trying to combine the motor control and distance variation was difficult. Fly back diodes were used to prevent the H-Bridges from burning out. However, we still burned out many H-Bridges.
- The encoder chips also burned out - why?
- The PING sensor also burned out - why?
- The length of wires for the Encoder A and B should be limited. A longer wire seems to result in loss since the signal is oscillating at such a fast speed, there is loss of the wire is too long.
Notes
A few things we might change if we did it again:
- Try another actuator that requires less intense motor control.
- Test different wires for length and diameter for optimal performance for the Encoder A and B connections
- Figure out why the pics could not be combined onto a single board.
