NU32v2: Using the Simulator
From Mech
Revision as of 19:17, 4 January 2011 by Nelson Rosa (talk | contribs)
NDM 1/4/2010 Page Under construction
Introduction to the MPLAB Simulator
The MPLAB Simulator is a debugging tool that allows you to test code without programming it onto a PIC32. Simple debugging, such as watching the values of variables or registers, can be performed, as well as advanced features, such as simulating inputs from a UART.
Starting a Simulator Project in MPLAB v8.63
- Open MPLAB v8.63.
- If a project is already open, close it by going to Project -> Close -> (the project name)
- Start a New Project by going to Project -> Project Wizard.
- Follow the steps in the Project Wizard.
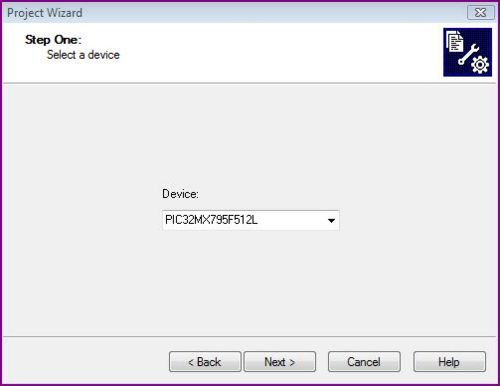
- Select the PIC32MX795F512L as your device.
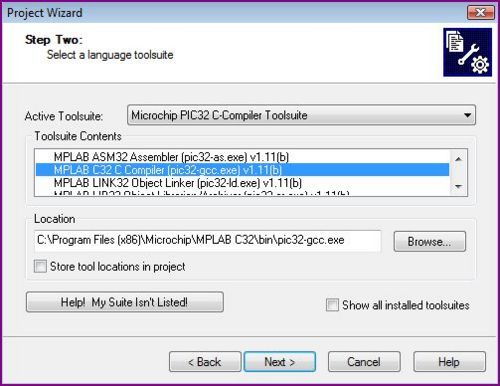
- Select the Microchip PIC32 C-Compiler Toolsuite as your Active Toolsuite. Select the MPLAB C32 C Compiler (pic32-gcc.exe) v1.1(b) from the Toolsuite Contents.
- Place your New Project File in a new folder.
- Add existing files to your project folder if you have any.
- Click Finish to create the New Project.
Sample Code
To learn how to use the Simulator, add the following sample code to your project: ...
Setting up MPLAB SIM
To run the sample code in the simulator,
- Download and unzip MPLAB_Invest_Example
- Launch the invest MPLAB project, invest.mcp
- open invest.c
- Go to Debugger->Select Tool->MPLAB SIM
- Go to Debugger->Settings... and click on the "Uart1 IO" tab
- In the "Uart1 IO" tab
- click on "Enable Uart1 IO" checkbox
- in the "Input File" field, click the "Browse" button and add input.txt
- click on the "Window" radio button
- hit "OK" to change the settings and close the window
- Go to Project->Build Options...->Project, select the "MPLAB PIC32 Linker" tab and
- enter a heap size, 4096 bytes works for this example
- hit "OK" to change the settings and close the window
- Compile the program (you can press F10 or go to Project->Make)
- Run the debugger (press F9 or go to Debugger->Run) If you see text similar to what you saw in the first day of class scrolling by in the Output window, then everything is working correctly. Next, we'll briefly go over a few basic features of the debugger, but let's reset the debugger first.
- Halt the debugger by pressing F5 or Debugger->Halt
- Reset the simulation/microcontroller by pressing F6 or Debugger->Reset->Processor Reset

