Difference between revisions of "NU32: Starting a New Project and Putting it on the NU32"
NickMarchuk (talk | contribs) |
NickMarchuk (talk | contribs) |
||
| Line 1: | Line 1: | ||
Return to [[Microchip PICs#Using the NU32|Using the NU32]] |
|||
= PIC32 Programming in C = |
= PIC32 Programming in C = |
||
Revision as of 16:29, 27 December 2011
PIC32 Programming in C
Note: Code downloaded from Microchip is constantly evolving, and it is possible that the information below will be outdated for future code releases. This information is accurate for code downloaded from Microchip's website in December 2011. Also, sample code developed by us and others are generally modified from working code for different purposes, and therefore you may find unnecessary legacy code, programming inefficiency, or even incorrect code in some samples.
You should complete the instructions in NU32: Software to Install if you have not already. For this page specifically, you need to
- download and install the MPLAB X IDE (Integrated Development Environment) that you use for programming, compiling, debugging, and simulating your PIC code. The MPLAB C32 Compiler is included in the installation instructions
- download the NU32 Utility computer application
- install drivers for the FTDI USB-to-Serial chip on the NU32 board
The remainder of this page describes how to create a new Project in MPLAB X, compile a general "Hello World" program to blink the LEDs on the NU32, and use the NU32 Utility computer application to put the program on the NU32.
Create a New Project in MPLAB X v1.00 for the NU32
For organizational reasons, it is recommended to use the MPLABXProjects folder created during the MPLAB X IDE installation to store your projects.
Download and unzip the procdefs.ld file from this .zip file and place procdefs.ld in the MPLABXProjects folder. You will need to put procdefs.ld into each project folder as you make new projects for your code to work on the NU32.
Procdefs.ld is a linker file. If you have installed a bootloader (such as with the NU32), the linker file tells the compiler to rearrange the memory of your program so that it doesn't overwrite the bootloader code that is already on your PIC32. If you do not put procdefs.ld in the folder that contains your source code, MPLAB X will use the default procdefs.ld (unfortunately we cannot change the name to make this more clear.) Fortunately the bootloader will not overwrite itself, but your code will not work and will not give you an error telling you that you used the wrong prodefs.ld file. So every time you make a new project, copy the procdefs.ld file you put in the MPLABXProjects folder into the new folder that MPLAB X generates for each project.
Lets make new project, compile some pre-written code, and use the NU32 Utility to put it on your NU32.
- Open MPLAB X
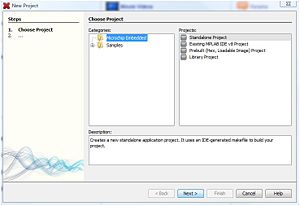
- Choose File -> New Project... to create a new project.
- Select Microchip Embedded and Standalone Project and click Next >.
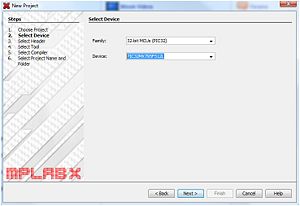
- Select 32-bit MCUs (PIC32) and the PIC32MX795F512L (the last one in the list) and click Next >.
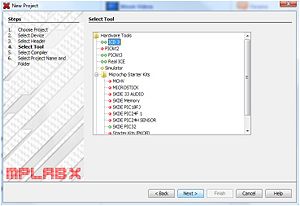
- Select the ICD 3 Hardware Tool (we will not be using the ICD 3, but select it anyway) and click Next >.
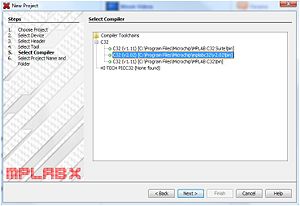
- Select C32(v2.02) from the Compiler Toolchains and click Next >.
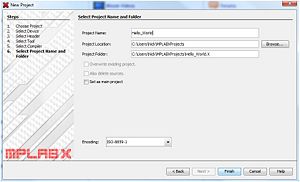
- Enter a project Name ("Hello_World") and click Finish.
Now go back to the MPLABXProjects folder, and you should see a new folder called "Hello_World.X". Copy procdefs.ld into "Hellow_World.X", as well as the standard NU32 header files from this .zip file and the hello world source code from this .zip file.
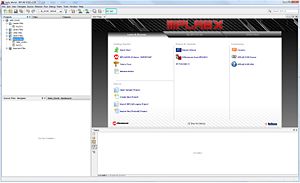
In MPLAB X, you can close the Start Page tab. Add the code to the project:
- Right click on Header Files in the Projects tab on the left and select Add Existing Item... Select NU32.h.
- Right click on Source Files and select Add Existing Item... Select NU32.c and hello_world.c.
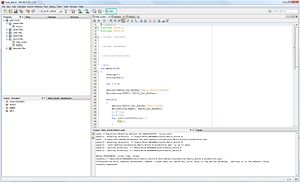
This code is ready to be used, so compile it by pressing the Build Project button (the hammer).
The Output window at the bottom of the screen should say BUILD SUCCESSFUL.
MPLAB X creates a .hex file when you compile the code. It is hidden away in your project folder, in dist -> default -> production, and given a name (projectfoldername).production.hex, or in the case of Hello_World, Hello_World.X.production.hex.
Next we will use the NU32_Utility program to put the .hex file on your NU32 board.
Using the NU32 Utility Computer Application
Now that you have compiled your code, you can use the NU32 Utility and the bootloader already on the NU32 to put it on your NU32 board.
Plug your NU32 into a power supply and turn on the board. Plug the USB cable into the board and your computer. If this is the first time you have plugged the board into your computer, drivers will be installed assigning your board two communication (COM) port numbers. Note what the port numbers are.
Now open NU32_Utility.exe.
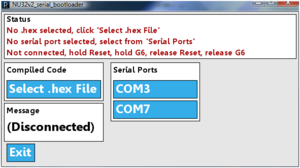
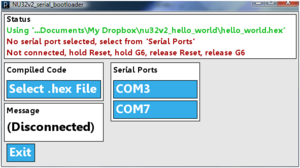
Note that the text in the 'Status' box are red and your COM port is listed in 'Serial Ports'. If multiple ports are listed and you don't know which is your NU32v2 board, you can check 'Ports (COM & LPT)' in 'Device Manager'. Right click on each Port. The NU32v2 uses a chip made by FTDI, so your NU32v2 COM port will say "Manufacturer: FTDI". Usually your NU32v2 has the largest COM port number.
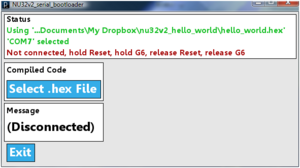
Click "Select .hex File", navigate to your project and select your hex file (projectname.hex). The path to your file will be listed in the first line in 'Status' in green.
Next click on the button corresponding to your COM port. The COM port you selected will be listed in the second line in 'Status' in green.
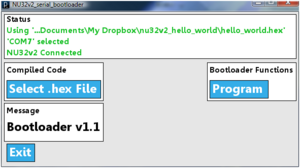
Next put your NU32v2 board into bootloader mode by pressing and holding the reset button on the NU32v2, pressing and holding the button in the top left breadboard between pin G6 and GND, releasing reset, then releasing G6. The 'Message' box will show "Bootloader v1.1" and the third line in 'Status' will state that your NU32v2 has connected in green.
Next click the "Program" button. Doing this will clear the memory of your NU32v2, write your code to the board, reset the board and close NU32v2_serial_bootloader.exe. Your code is now running on the NU32v2.
